The Bathrooms: Before & After

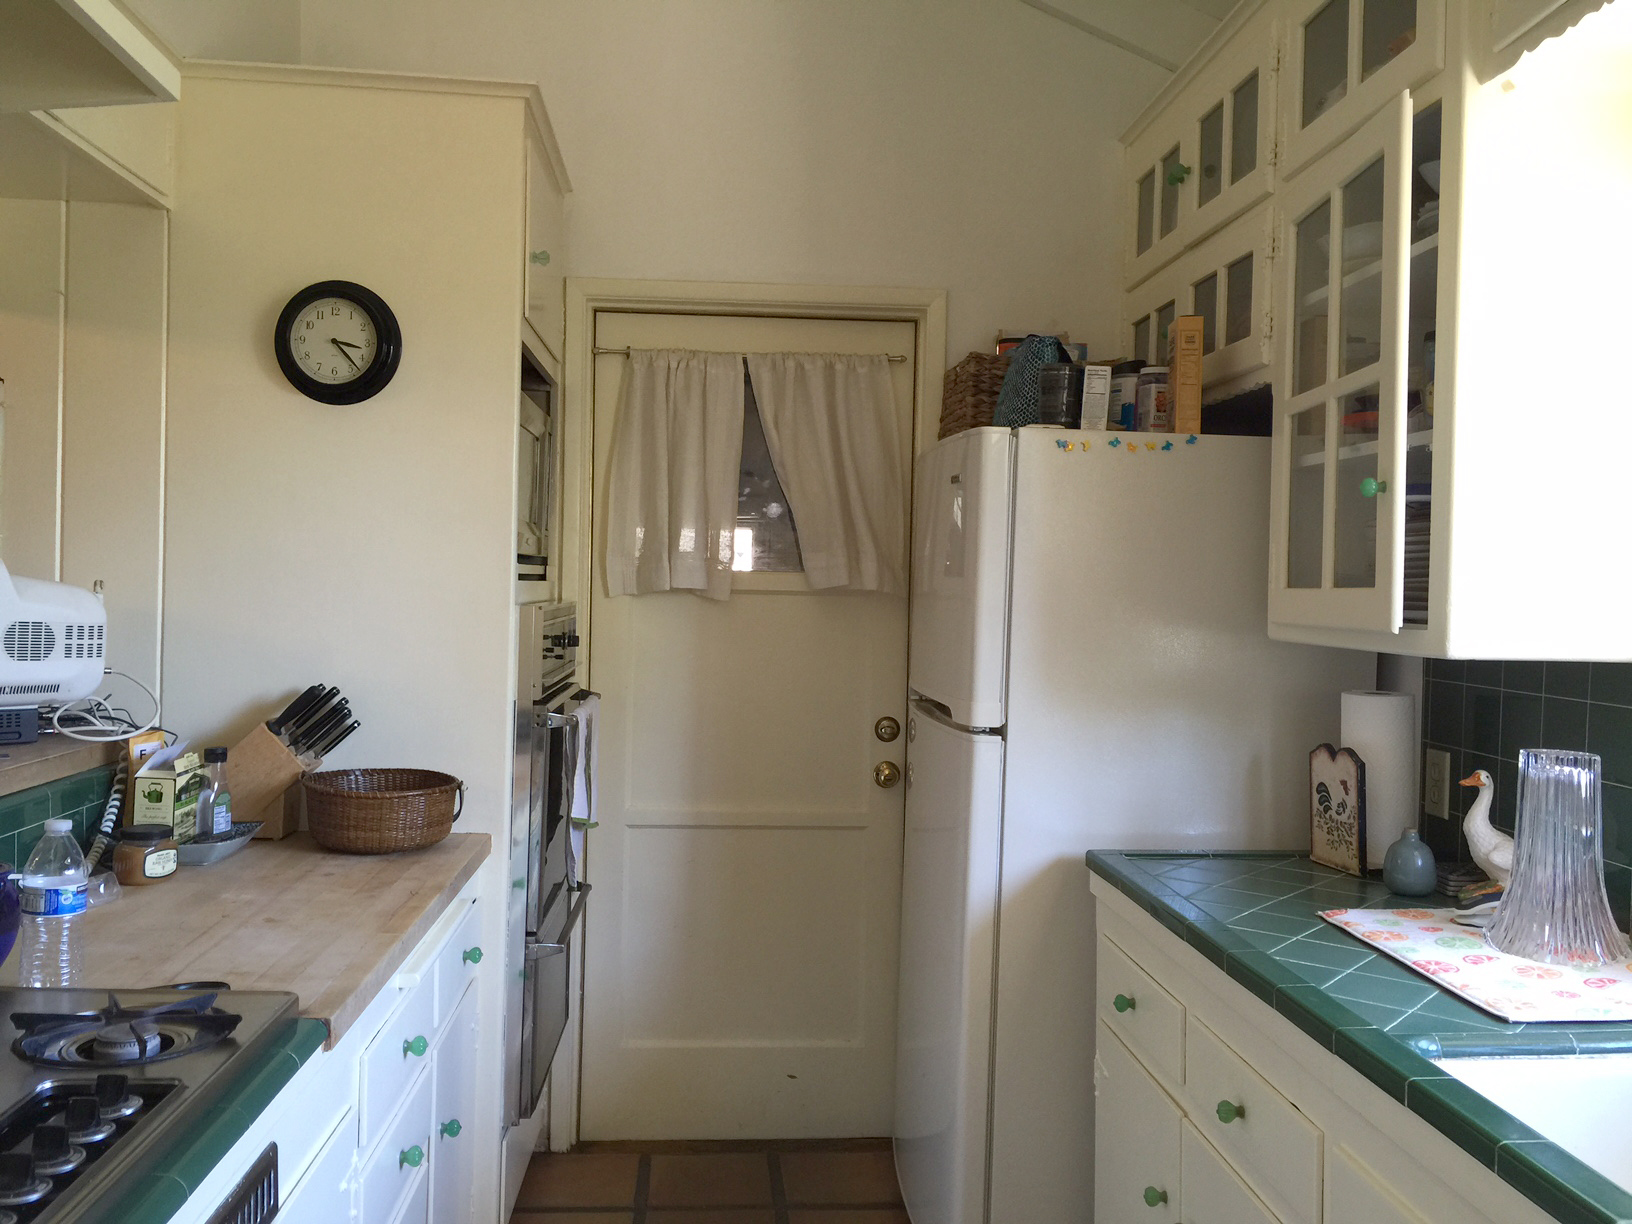
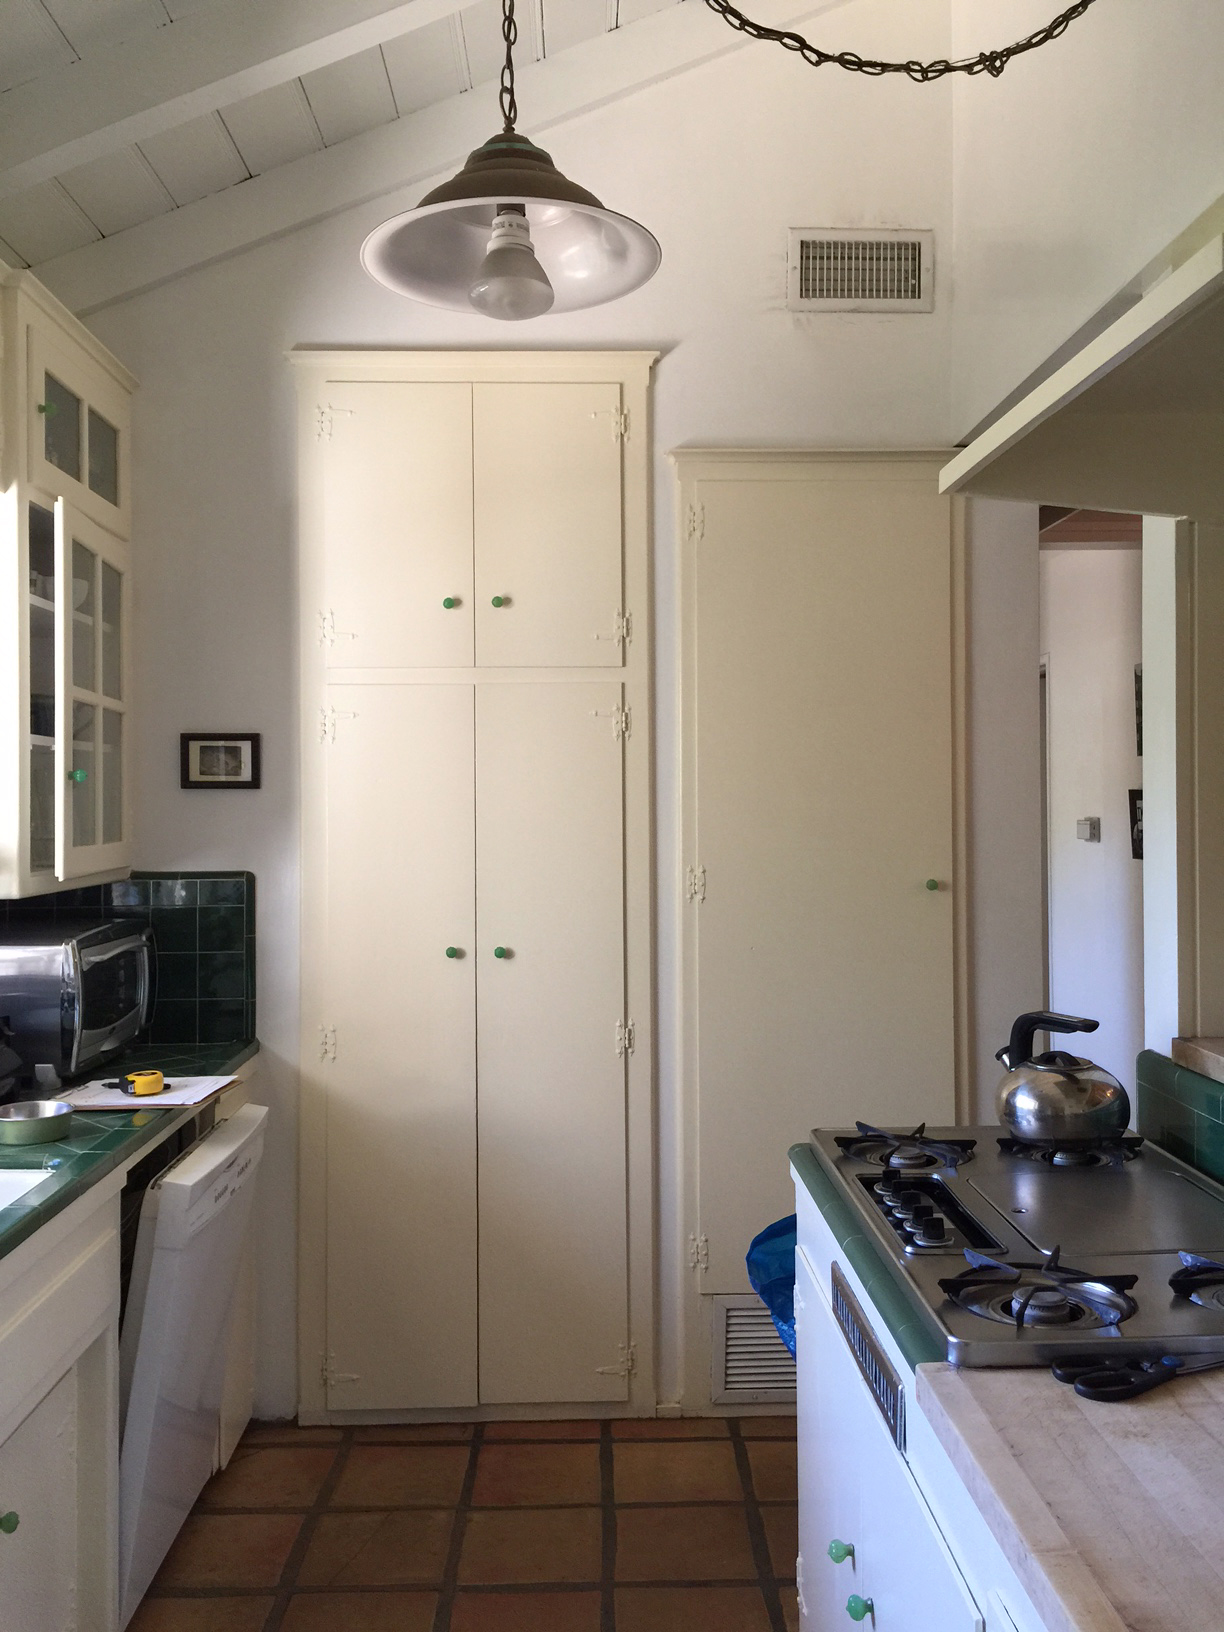
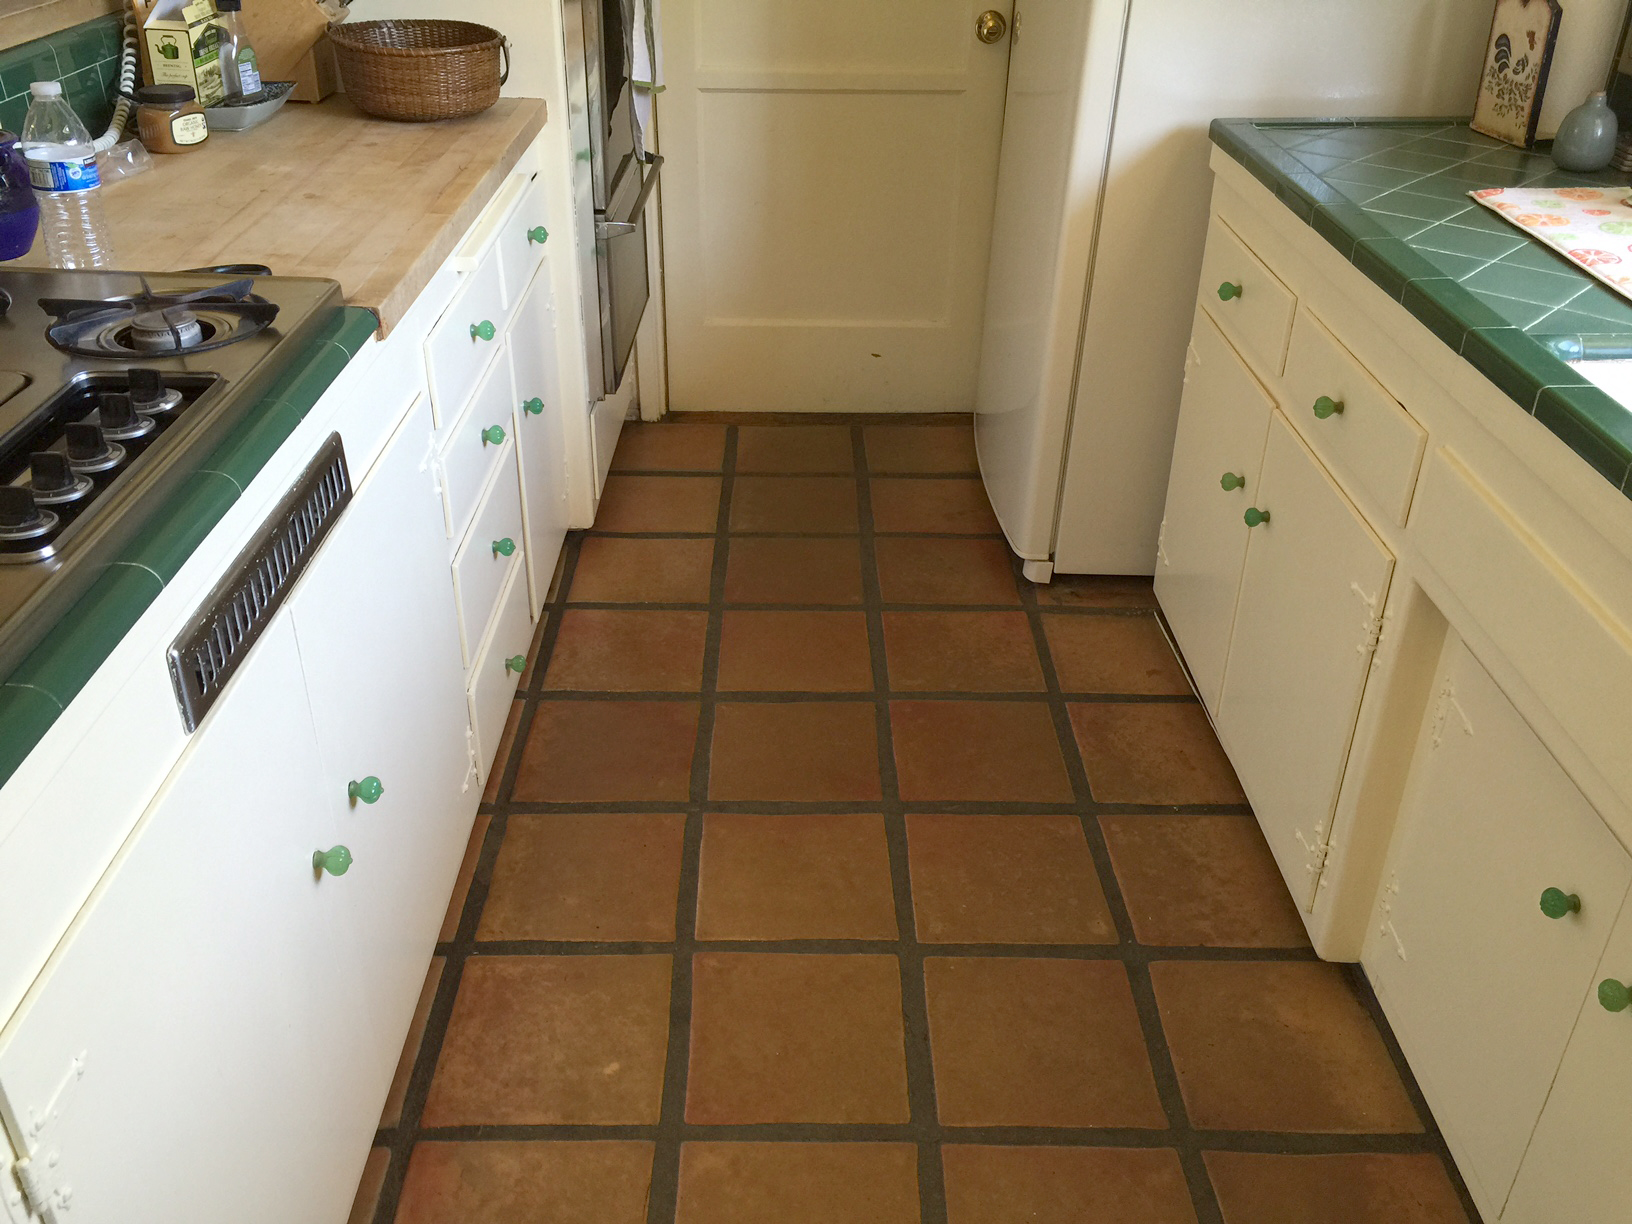
When David and I started renovating our little 50's house last year, the bathrooms were not on our initial to-do list. They really weren't all that terrible and I had convinced myself that the built-in vanities were actually kind of cute in that "they-don't-make-things-the-way-they-used-to" way. But after a series of unfortunate events that began with the intention of simply updating the leaky galvanized plumbing, which then led to us having to tear down said vintage vanities, which then led to the discovery of rotten floorboards...we eventually found ourselves with two completely gutted bathrooms. (You may remember seeing progress snapshots from this post.) Although it sure didn't feel like it at the time when we were taking cold baths with a bucket, these pictures remind us that it was all so worth it. As usual, scroll down if you'd like to see the "befores" first!

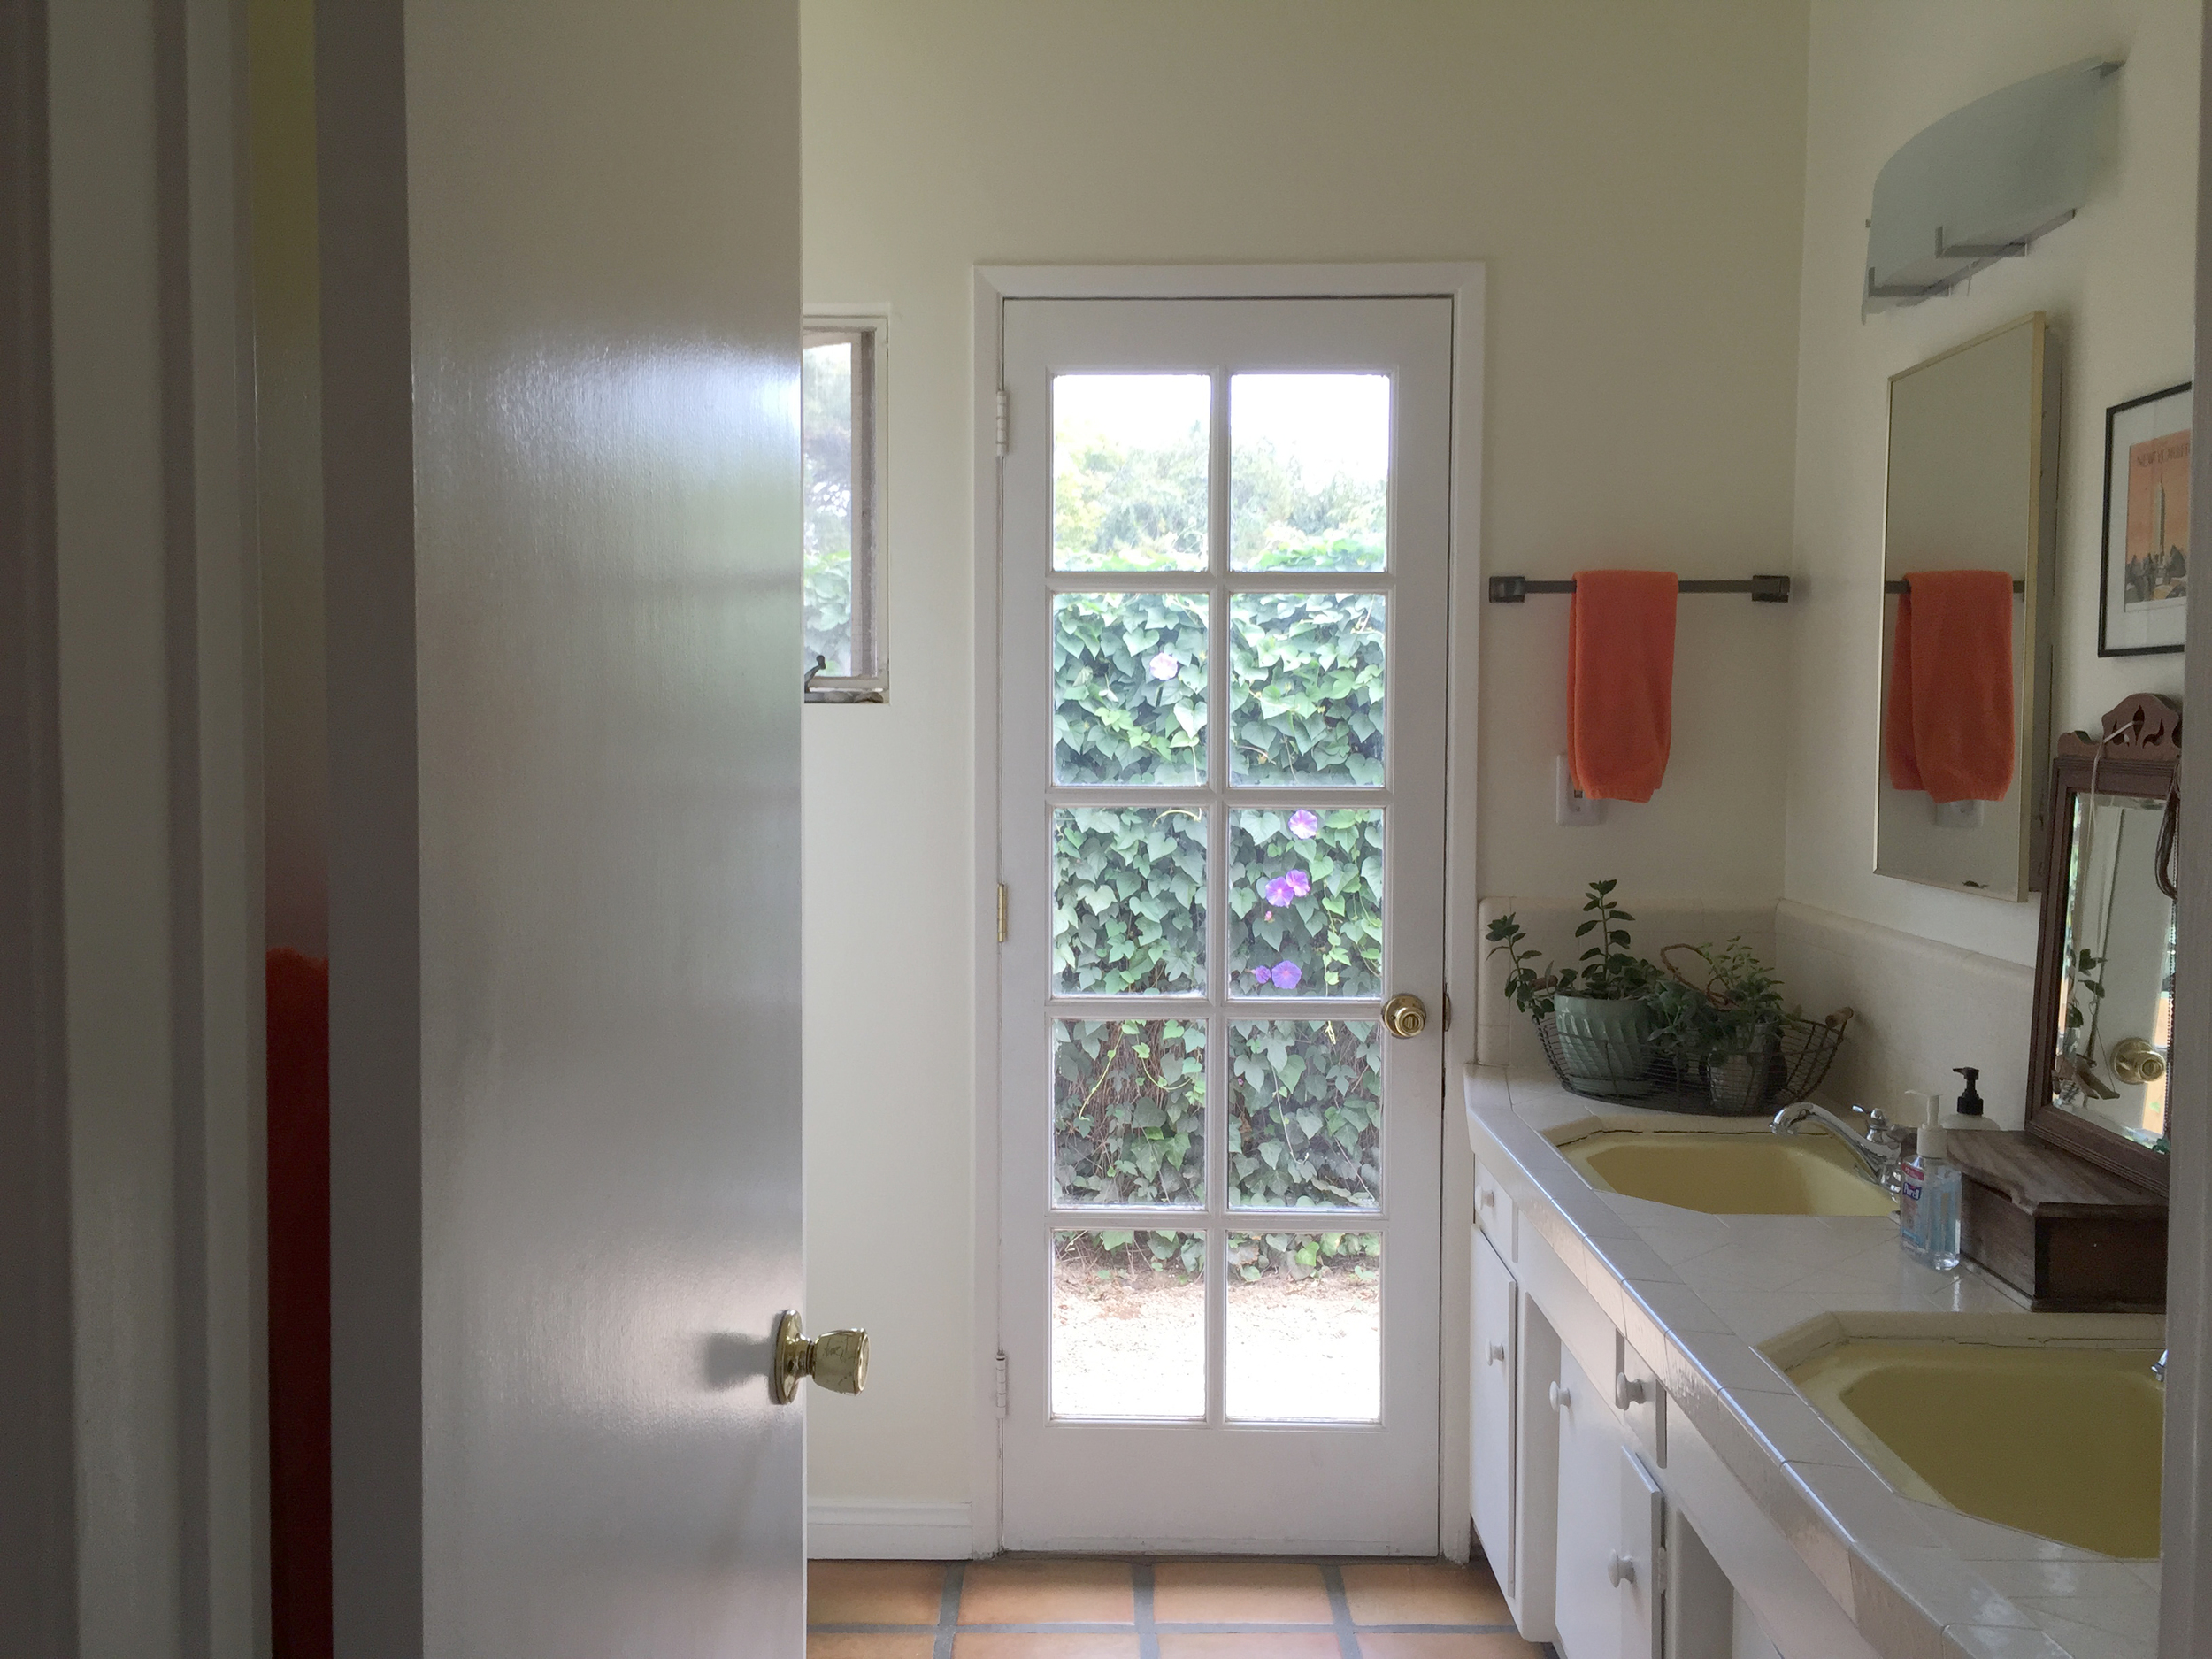
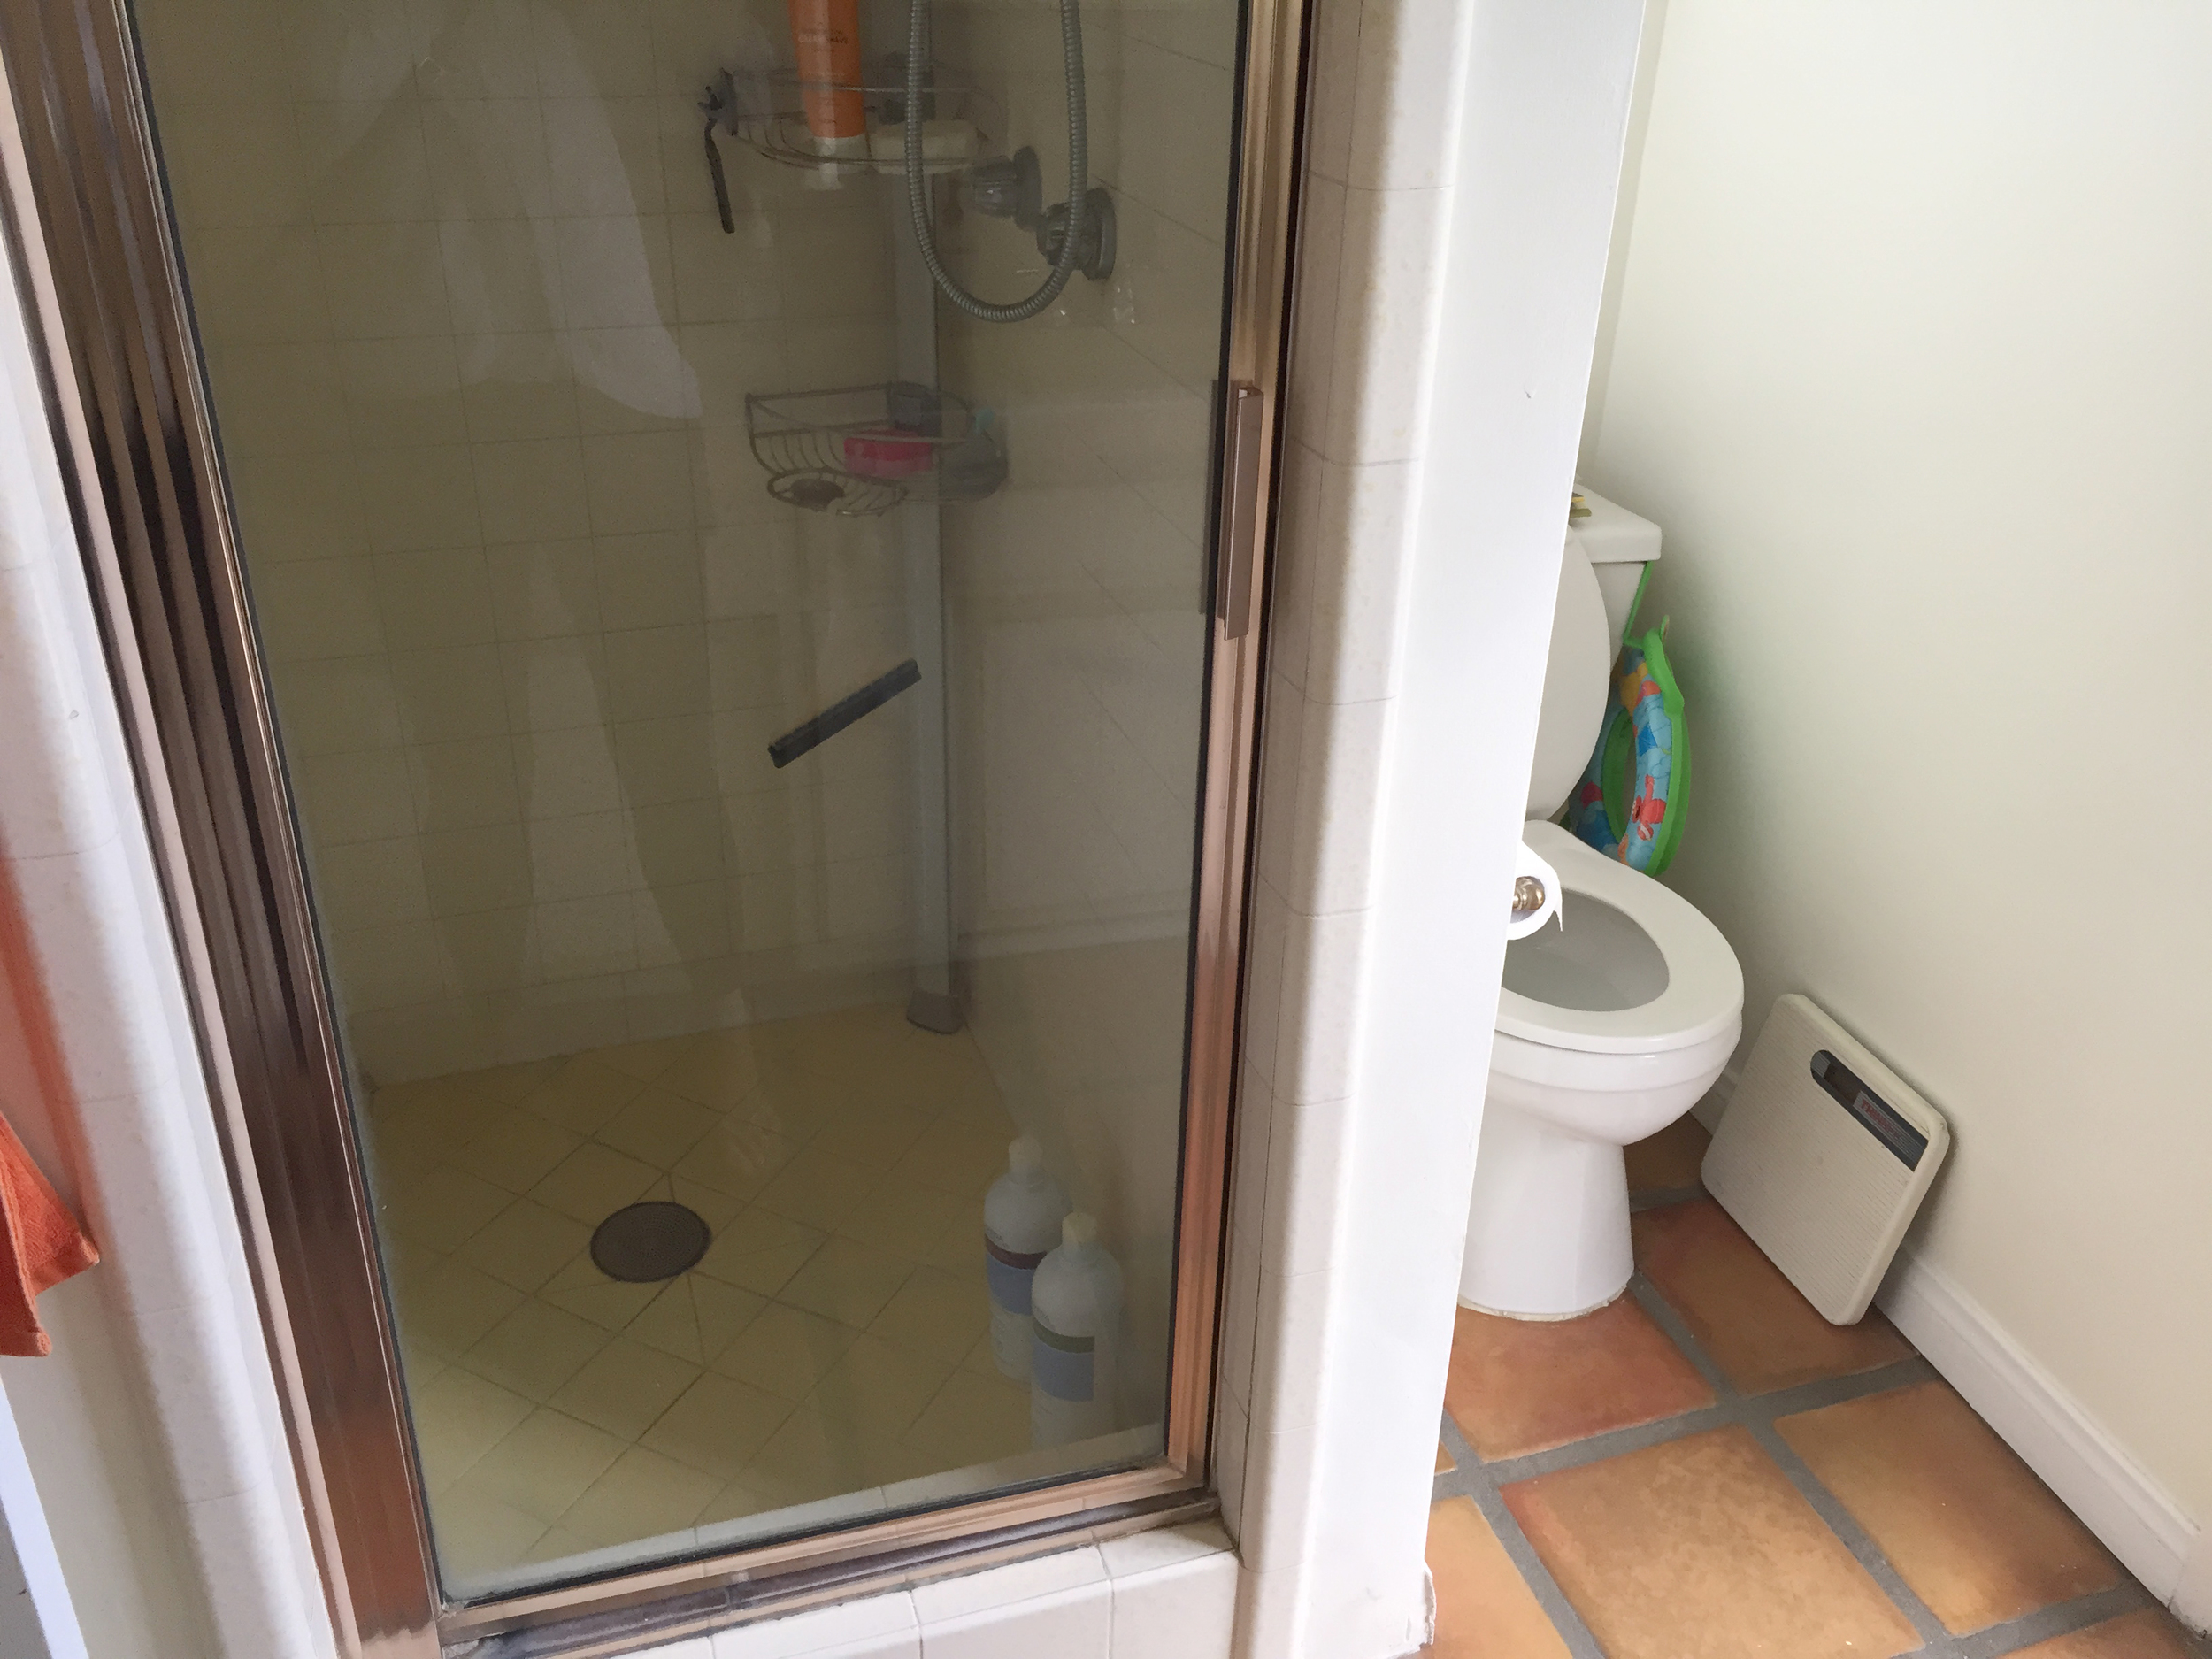
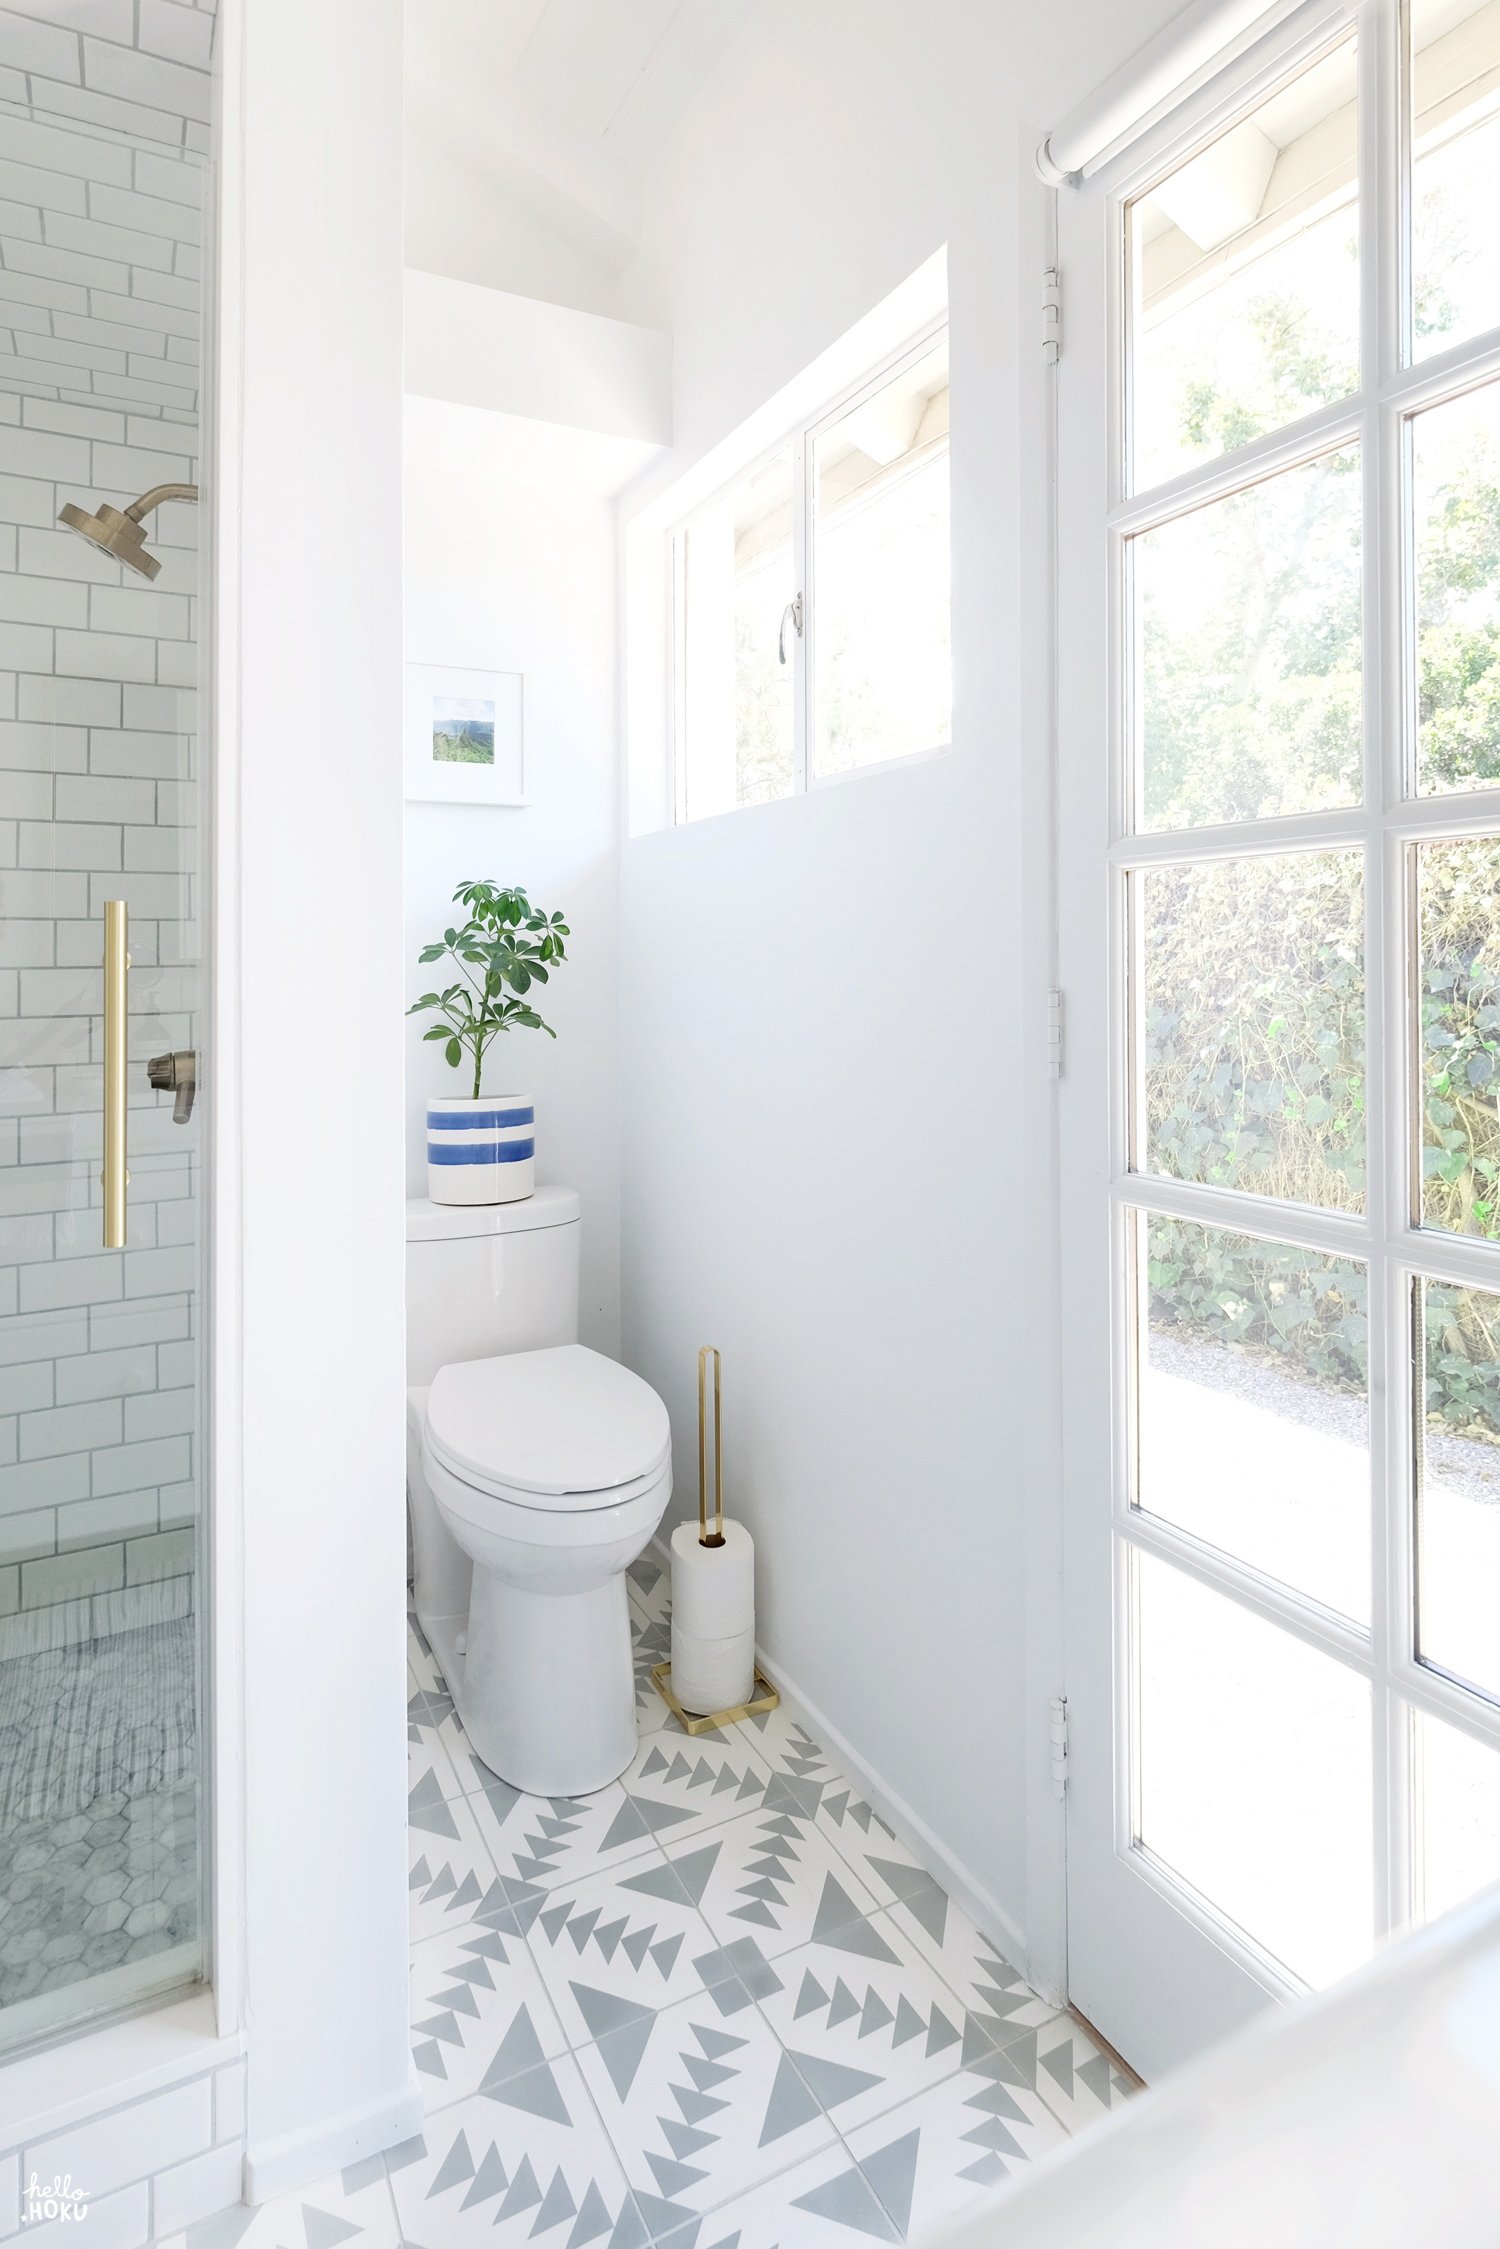
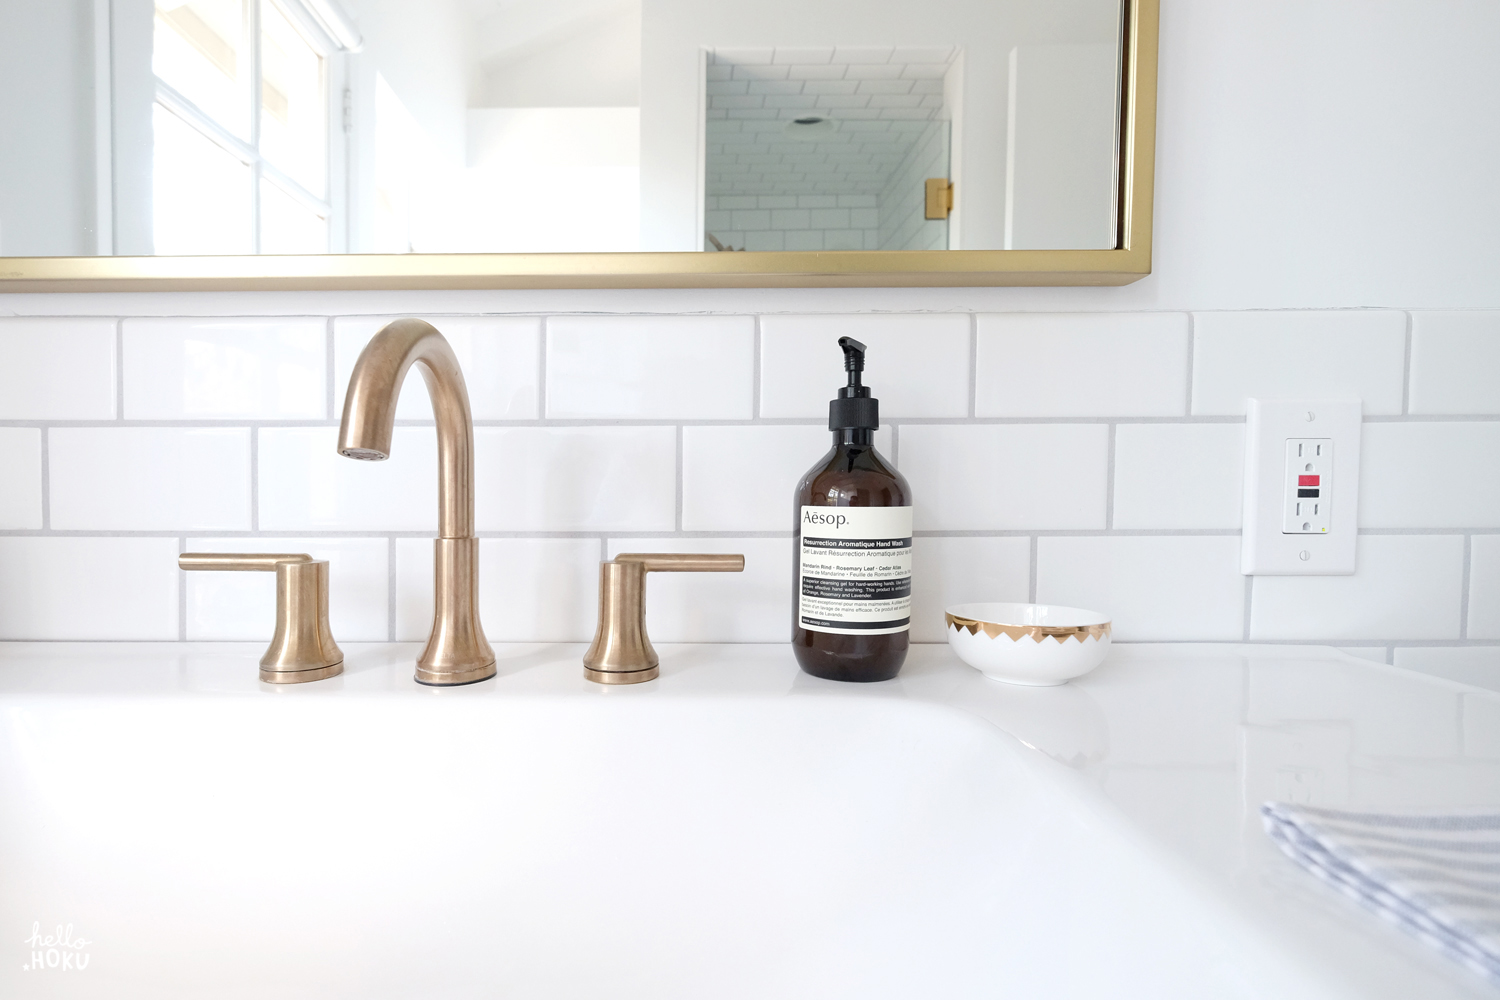
Our shower bathroom was previously known as the "yellow bath" for it's pastel yellow sinks and shower tiles. The goal for the remodel was low maintenance and practical yet fresh and relaxing. The door leading out to the dog run and backyard made the space ideal for freshening up after an afternoon of gardening or playing with the pup, and also let in a ton of natural light. We finished the room with a coat of bright white paint and added brass and wooden accents as well as a bold cement tile pattern for the floors. 

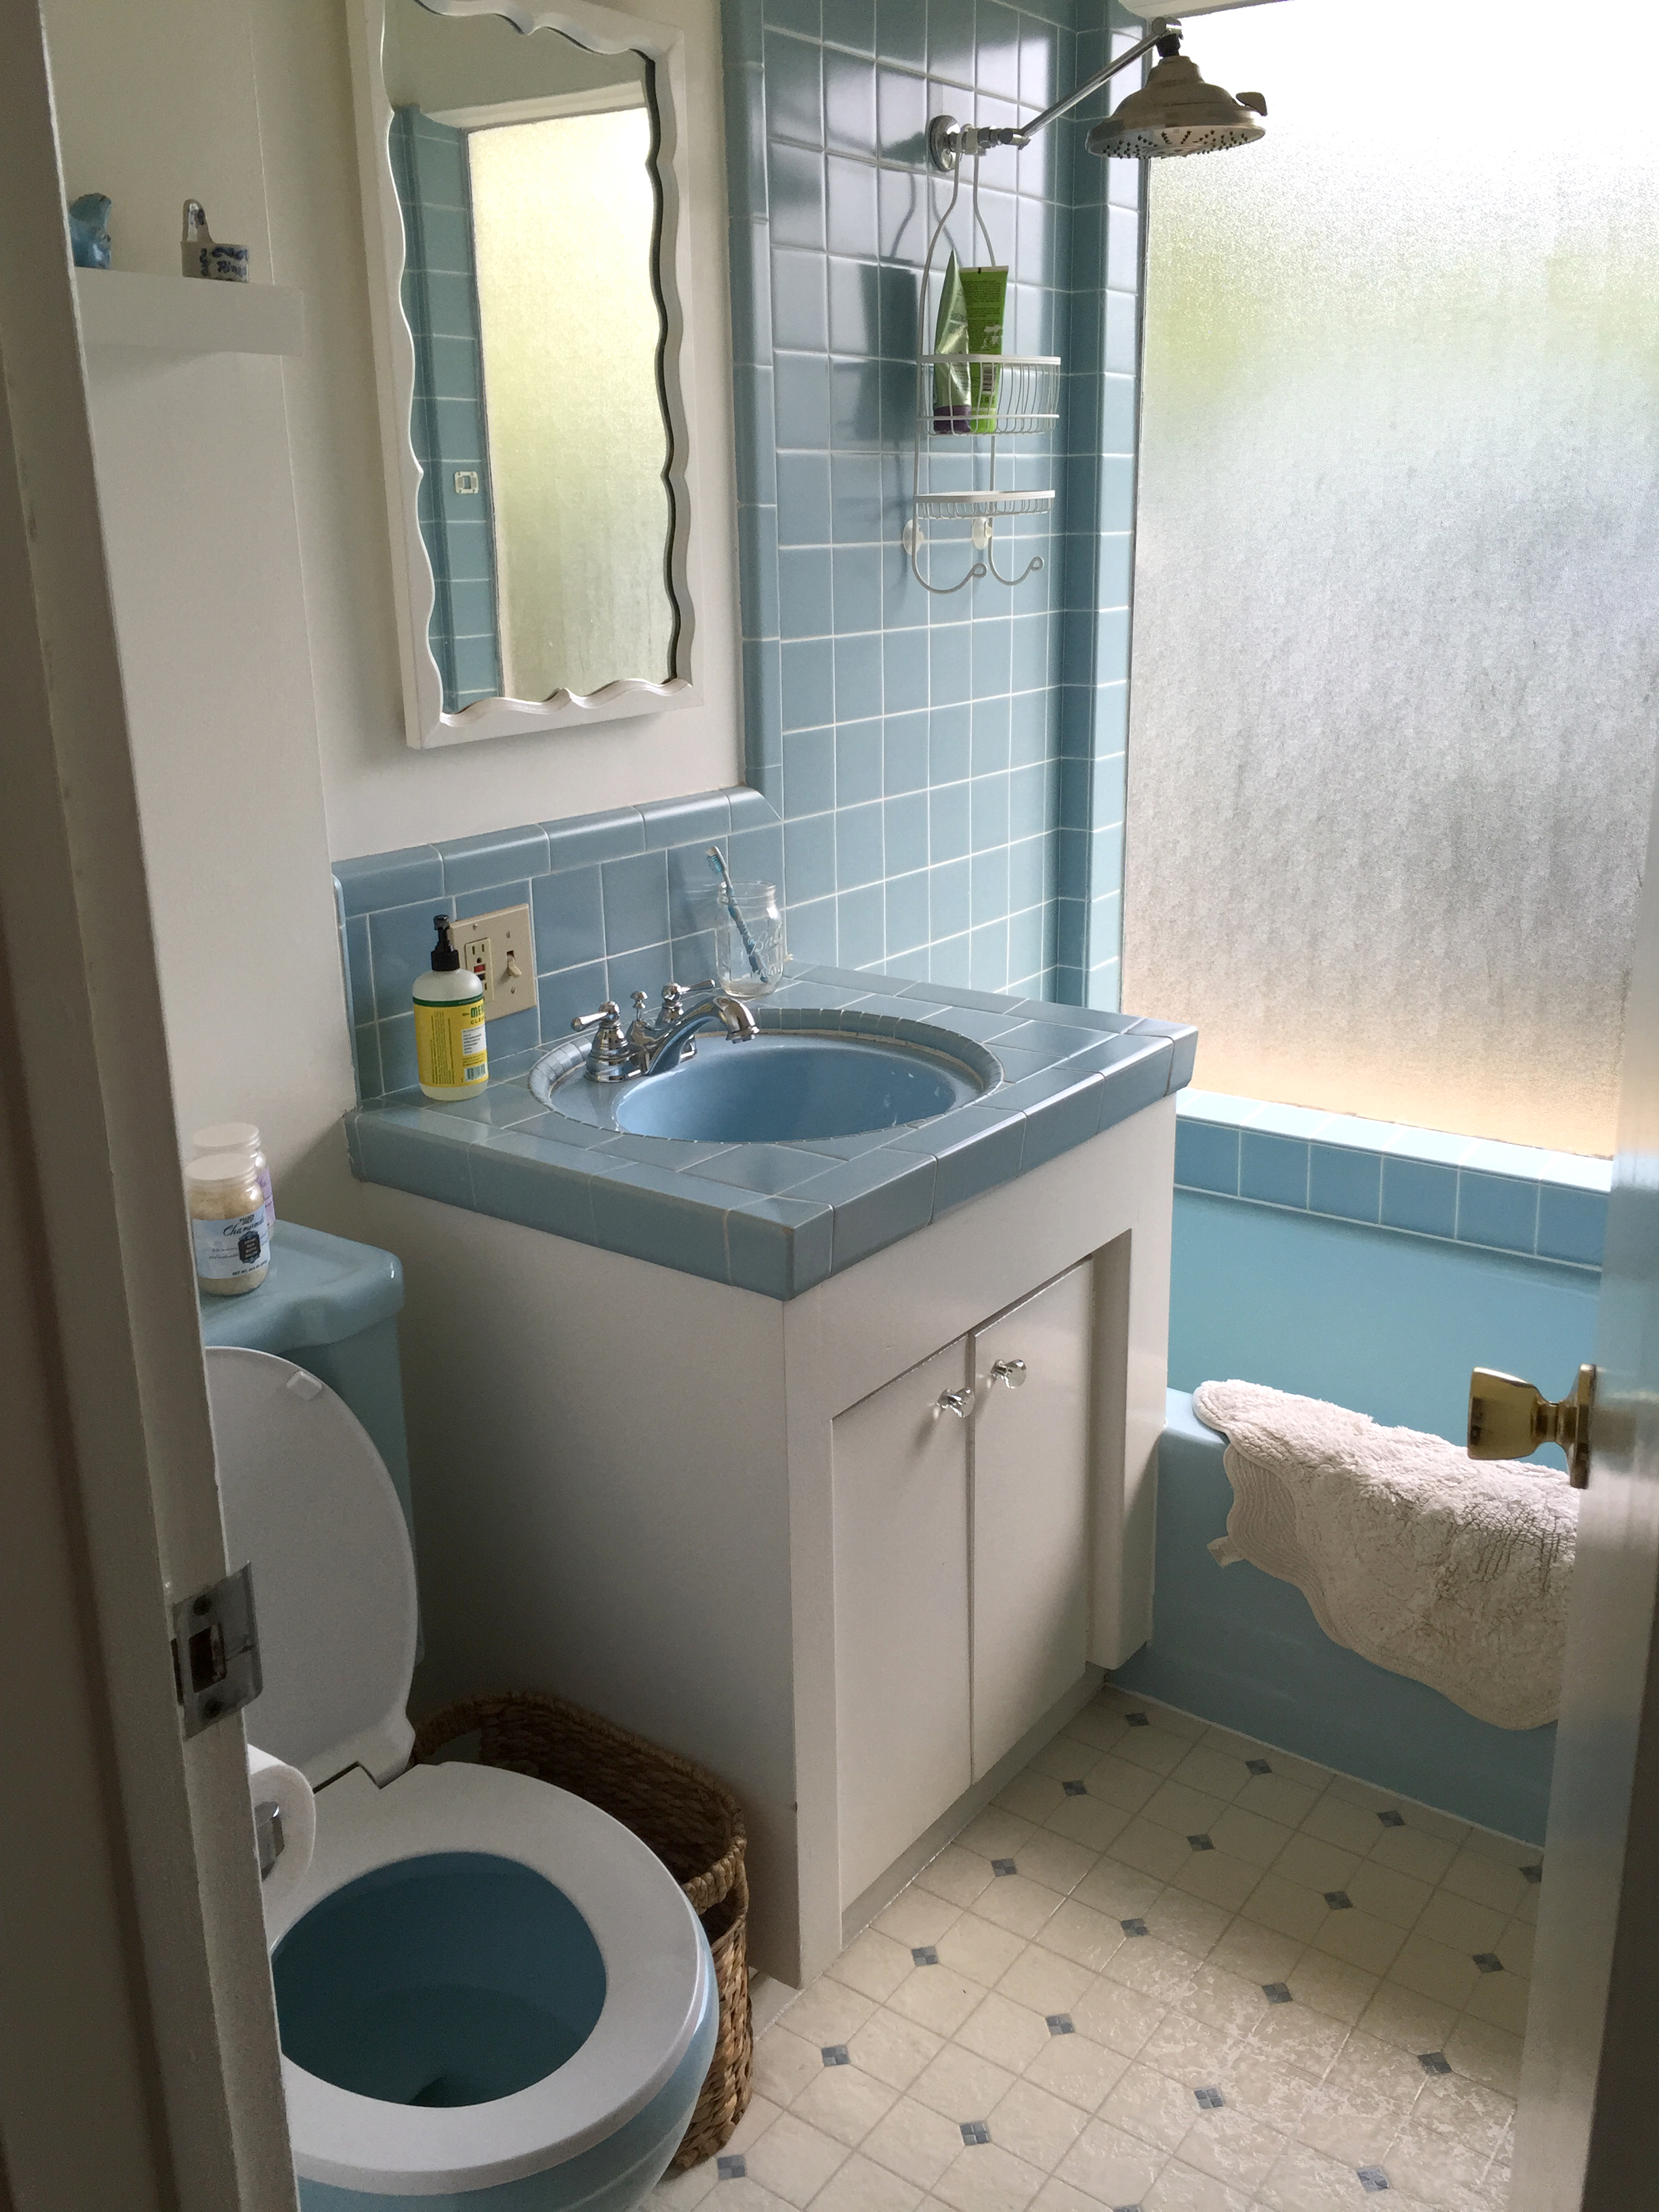
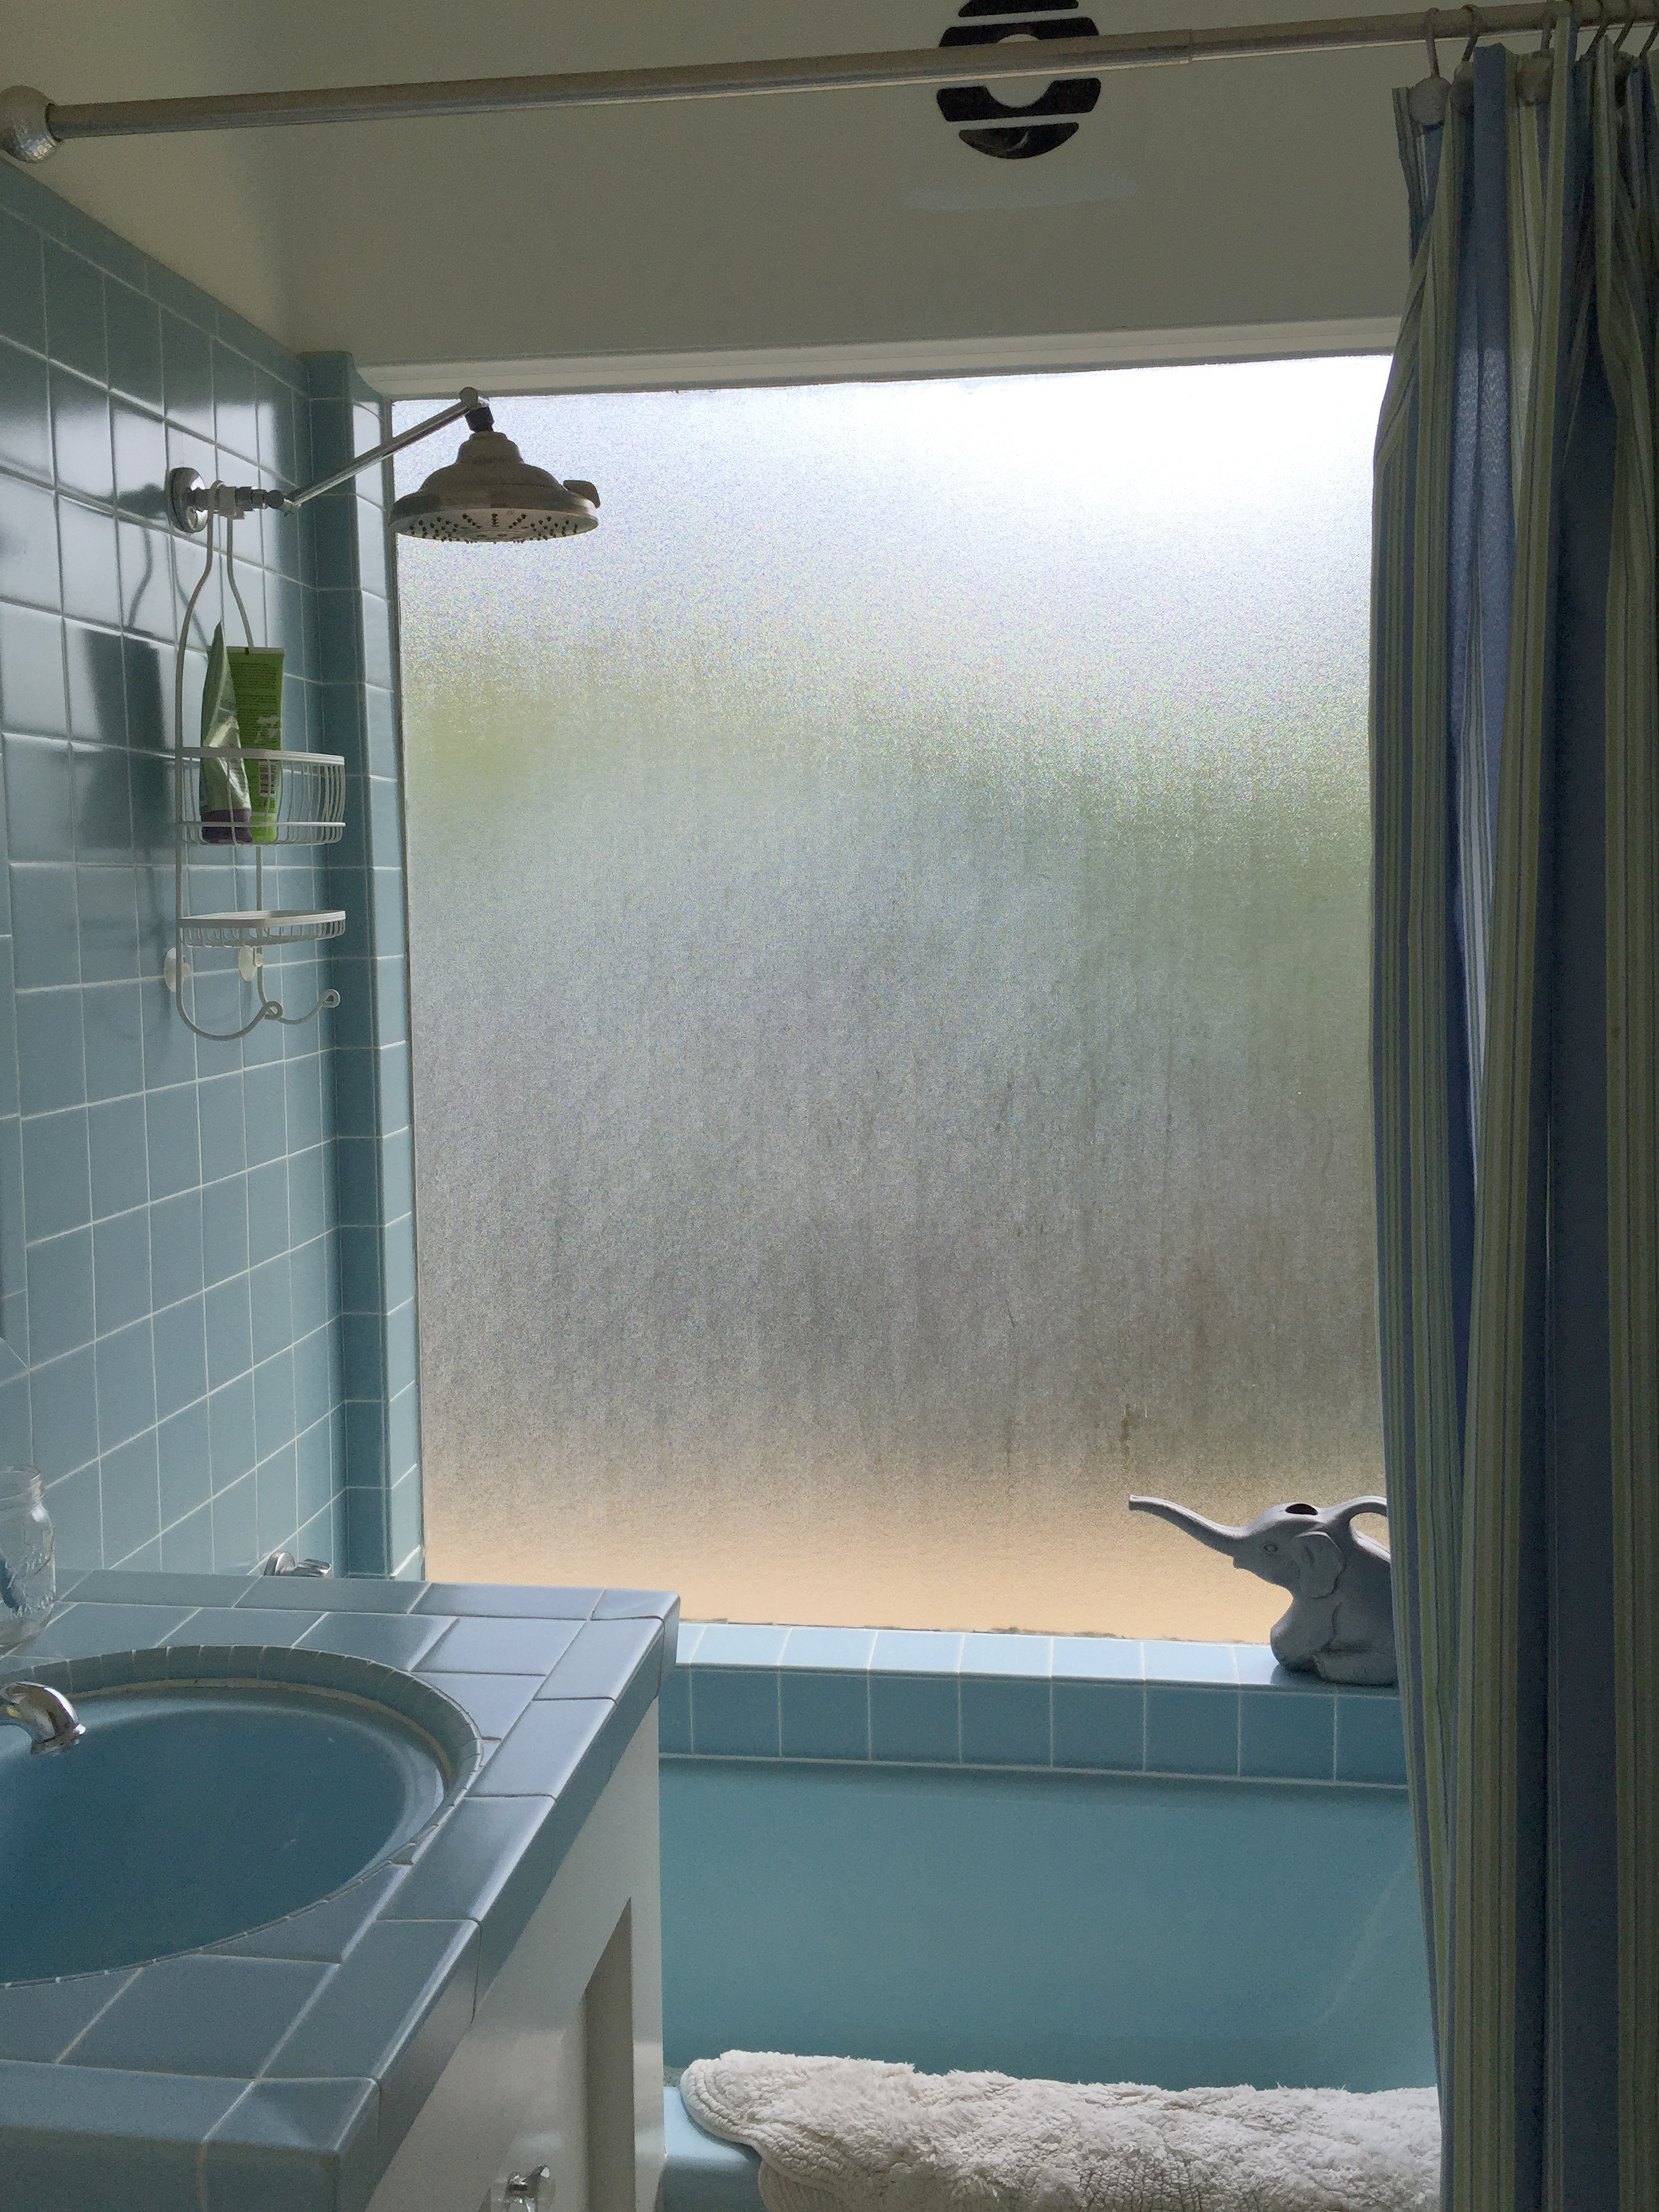
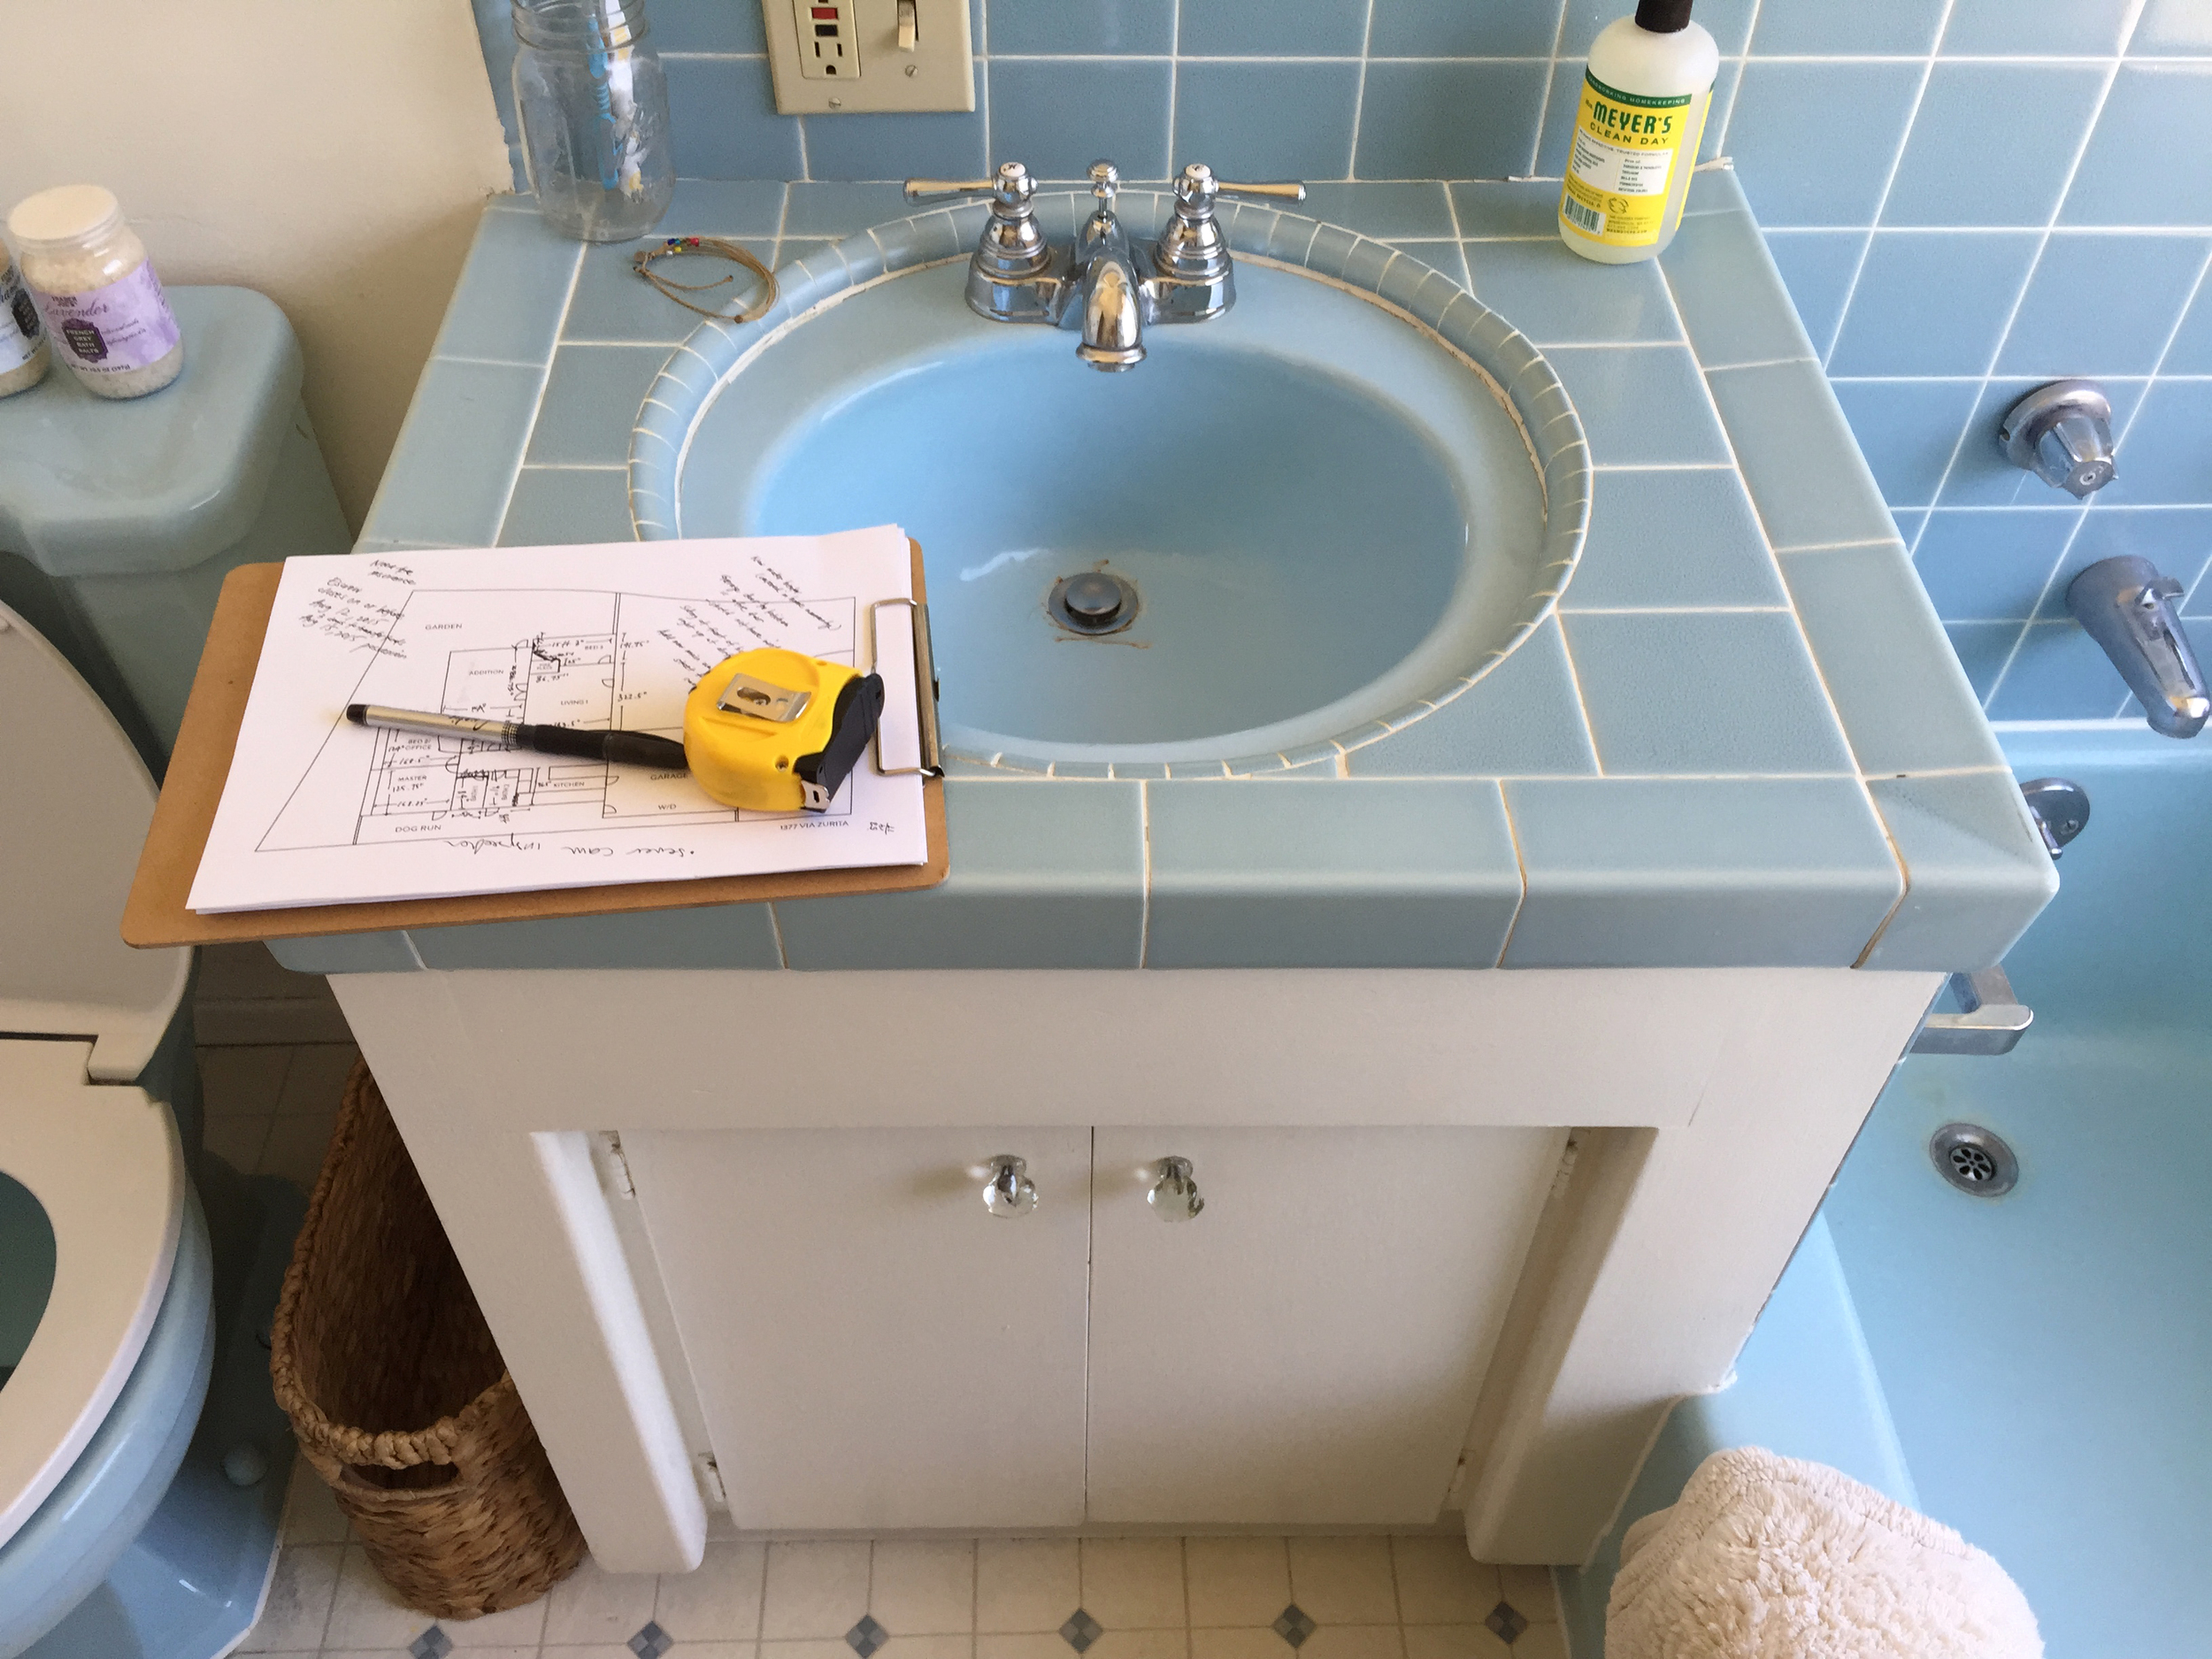
Our second bathroom has a tub and shares a wet wall with the shower bathroom. This one was appropriately dubbed the "blue bath" for its baby blue tub, vanity and yep, even toilet. But the craziest part was the huge translucent pane of glass right above above the tub. We did some visibility/privacy tests to see if we should live with it or fill it in and sure enough, anyone walking around outside could clearly make out all sorts of bodily shapes, if you know what I mean. I could only imagine what someone would be able to see at night. (Hint: everything.) The one thing we did not tear out was the baby blue cast iron tub. It was still in great shape and just needed to be reglazed, which was much more cost effective than a brand new tub. 

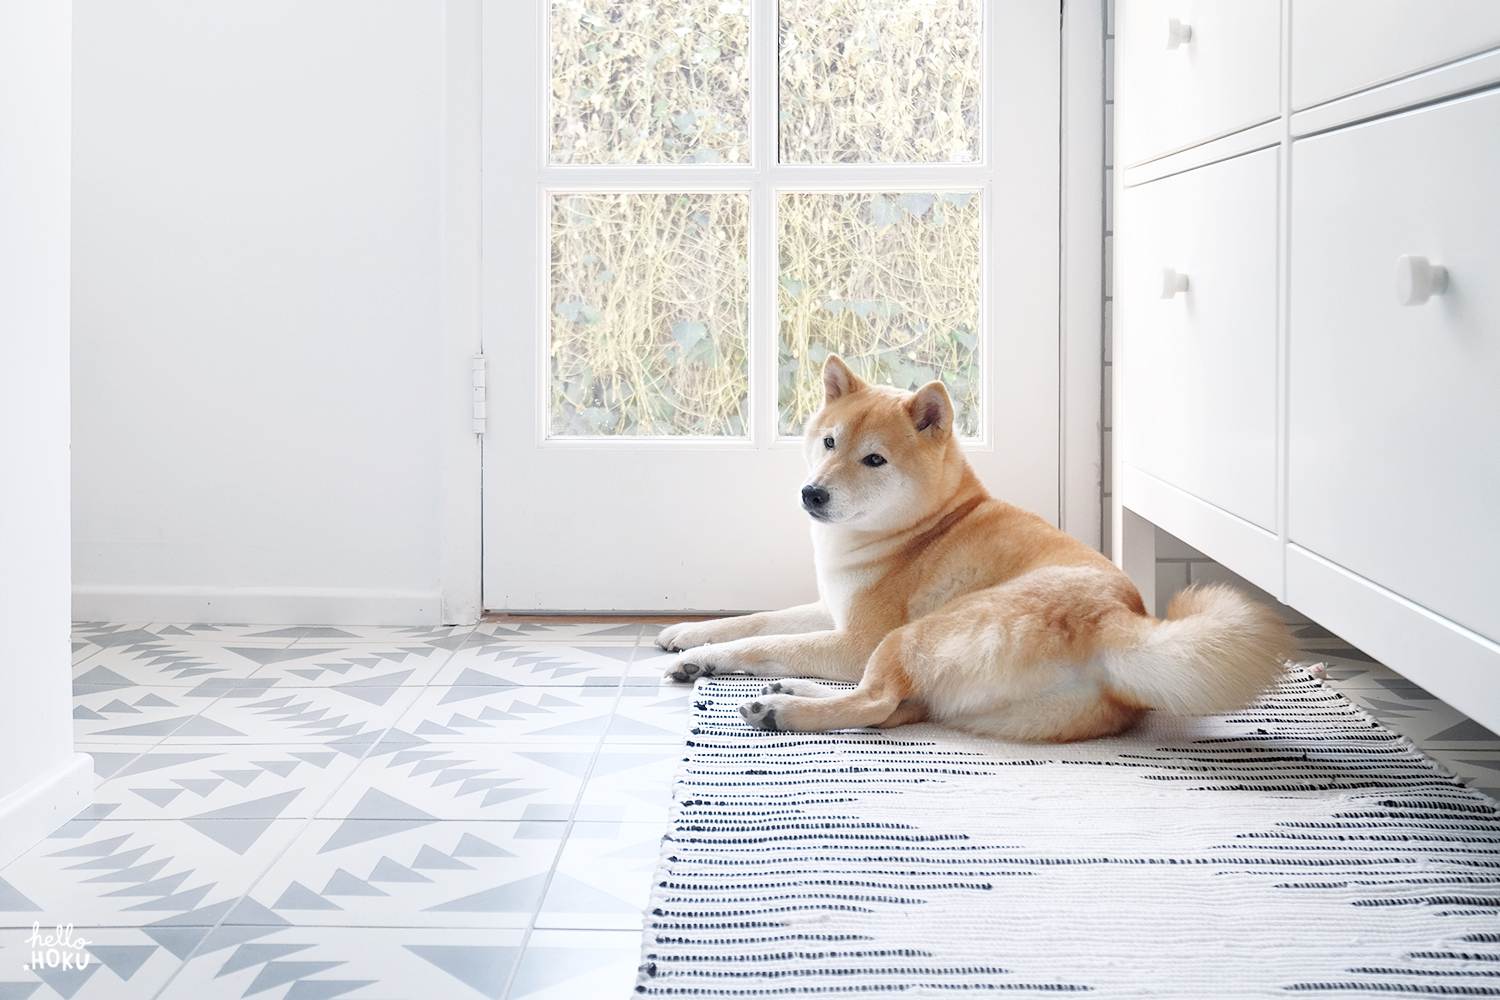
Currently this is Hoku's bathroom for all intents and purposes, as us humans prefer using the shower. Here he is in the morning getting himself psyched for a full day of eating snacks, chasing critters in the yard, and taking long naps. It's a tough job being a dog, but someone's gotta do it. 

Clearly he is not a huge fan of the "bath" part of the word "bathroom."

This is a new dog  bath we're trying from Aesop, by the way. So far, I love it. It's very mild and smells wonderfully minty and citrusy. 

Shower Bath Sources:

Tile: Cement Tile Shop
Sconces: Cedar & Moss
Mirror: West Elm
Faucet: Delta
Vanity: Ikea
Vanity Hardware: CB2
Wall Hooks: Light & Ladder
Bench: Ikea
Bath Mat: Urban Outfitters
Turkish Towels: Amazon
Toilet Paper Storage Tower: CB2
Paint: "Oxford White" by Sherwin Williams

Tub Bath Sources:

Tile: Cement Tile Shop
Sconce: Cedar & Moss
Mirror: Ikea
Faucet: Delta
Vanity: Ikea
Vanity Hardware: Myknobs.com
Wall Hook + Planter: Light & Ladder
Paint: "Oxford White" by Sherwin Williams
Dog Wash: Aesop

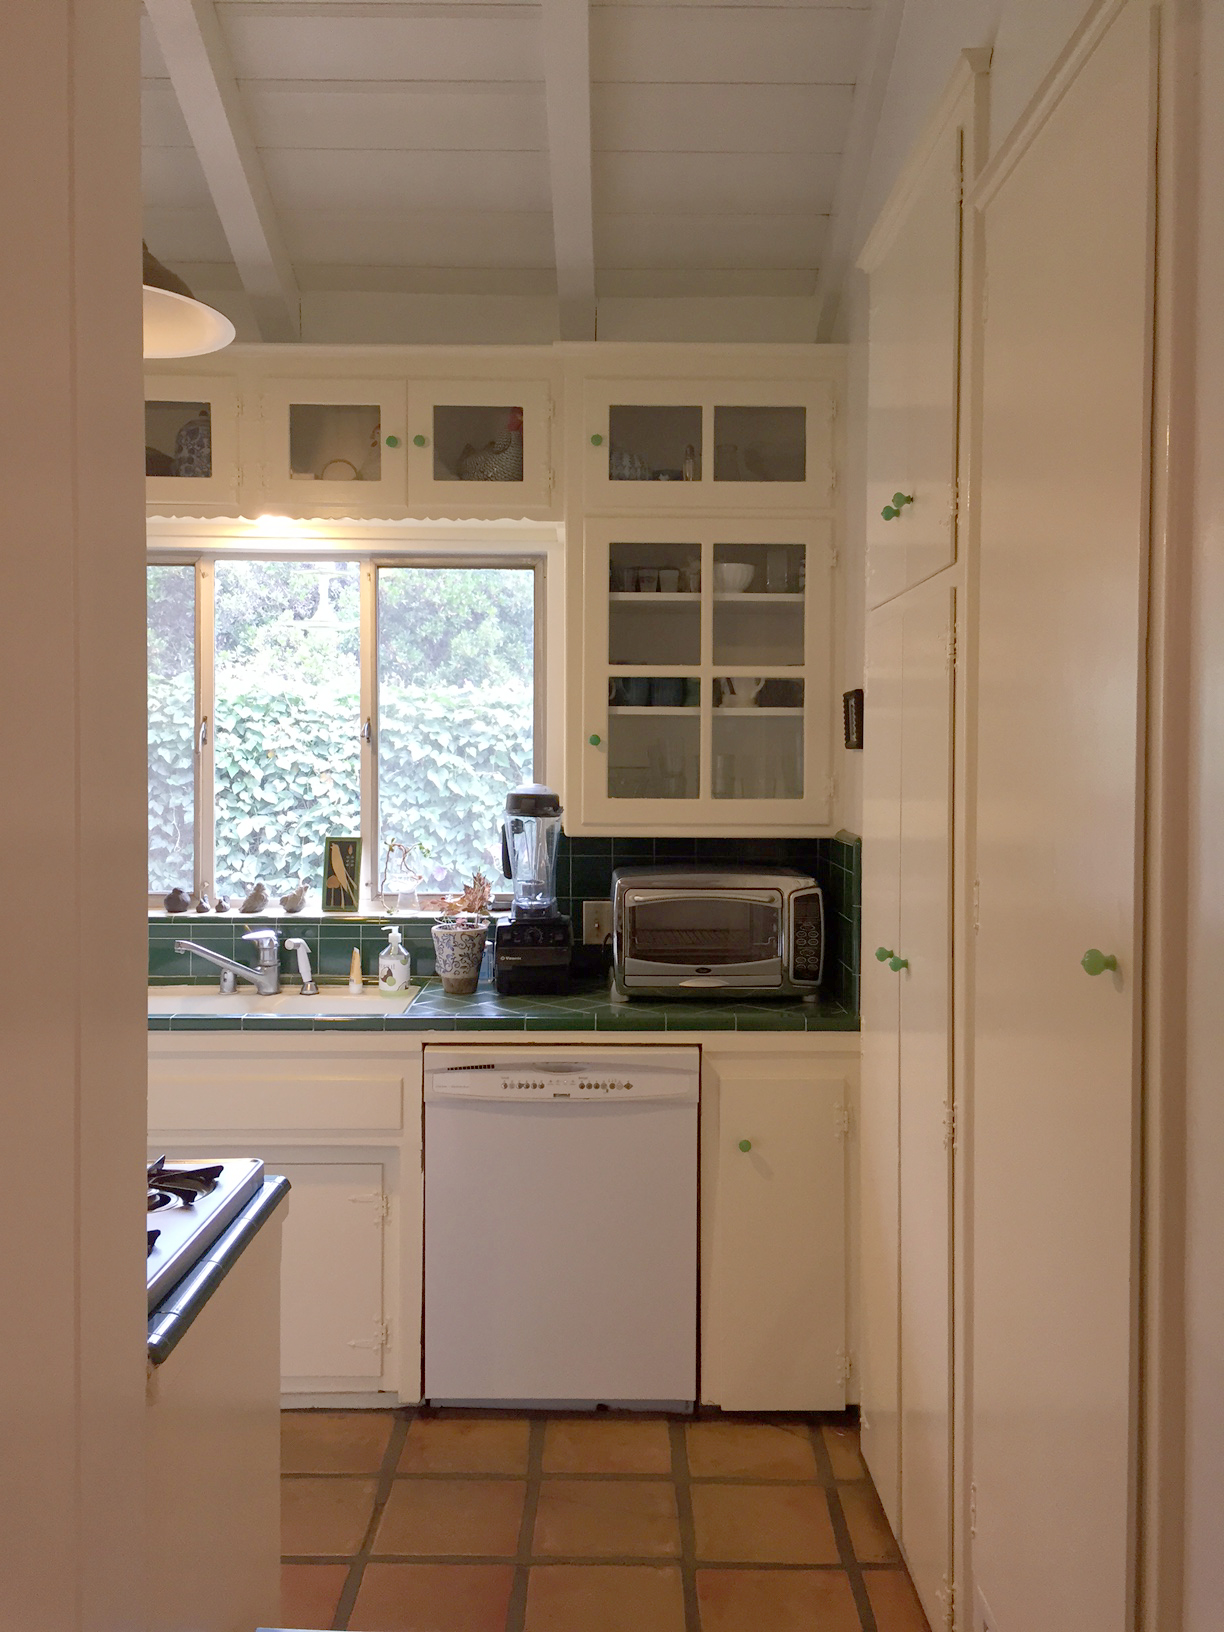
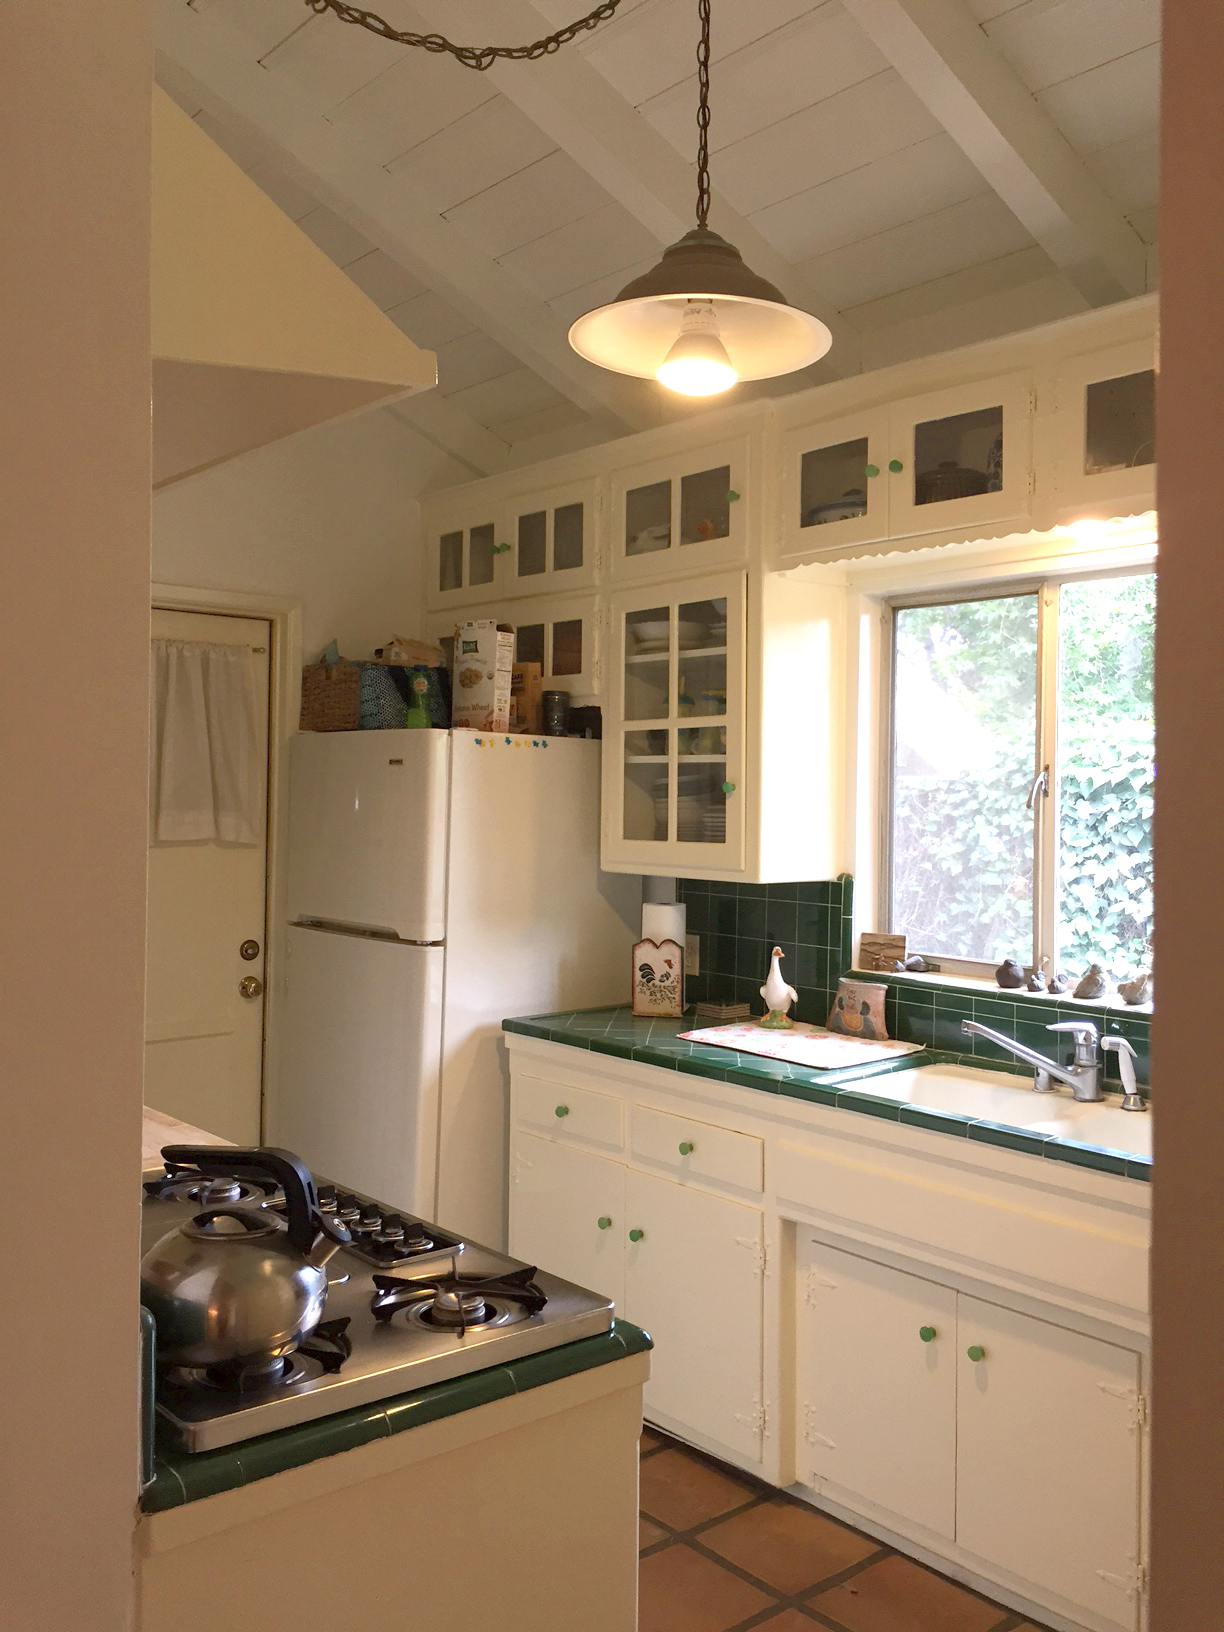
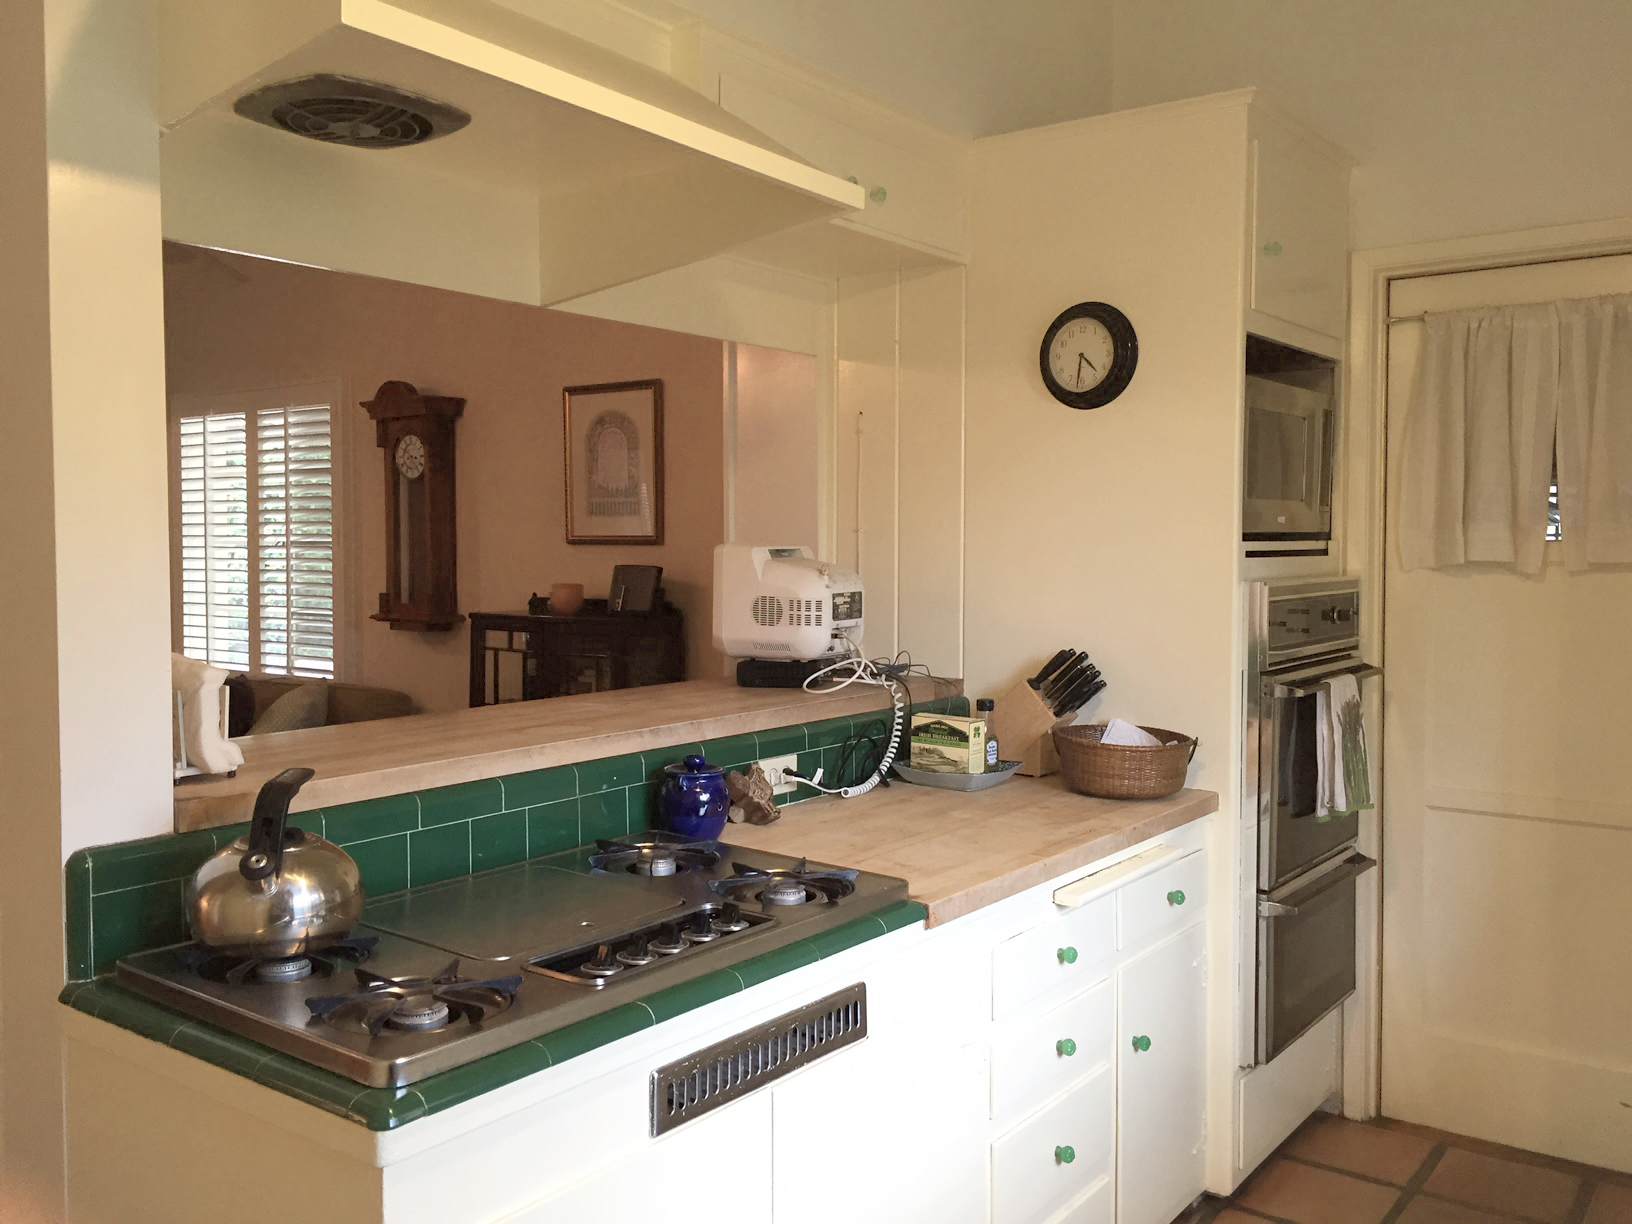
And finally, here are the Befores!

The Kitchen: Before & After

I'm excited to share our kitchen today. This is the space where David and I cook our favorite one-pot meals together every Sunday, where we share the quick "how was your day?" and where Hoku appears at the drop of a hat when he hears the sound of vegetables being cut on the chopping block. If you want to see the before pics first, close your eyes and scroll really quickly to the slideshow at the bottom, but I just couldn't help but to start off with the AFTERS. So without further ado, put on your sunnies and I present to you our blindingly white kitchen. 

Our goal with the kitchen was to give it the best facelift possible without breaking the bank. David and I aren't crazy chefs and all we really wanted was a space that was clean and comfortable. The old kitchen had these large red Spanish floor tiles that I absolutely loathed because it had dark 1" grout lines, but I convinced myself that I could live with it. One of the things we absolutely needed to remove, however, was the old dishwasher because it was just smelly and unsanitary. But get this...they had installed the dishwasher, then literally tiled it in. Like, permanently. So in order to remove the dishwasher, all the offensive tile had to go. (Not great news for the budget but sorry, not sorry?) We ended up continuing the hardwood into the kitchen since we were refinishing the rest of the house anyway and I'm so glad we did because, it looks soooo much better now. And where the dishwasher was, we turned into a drawer for trash and recycling to declutter our floor space.

The kitchen cabinets are all original as is the butcher block and cooktop. The cabinets got a fresh coat of paint, new hinges and hardware. Stripping  four layers of cruddy old yellow paint off the cabinets was probably my least favorite part of the process as it involved two full weekends of breathing in heavy fumes and applying a strong stripping agent that came close to burning the skin off our hands. But it was worth it...I think. We also got rid of all the dark green 50's style square tiles, replacing it with a 2"x8" marble subway tile backsplash and white quartz countertop.

Shopping for appliances was another ordeal. We had no idea how difficult it would be to find appliances to fit small 50's kitchens, namely the fridge and the gas wall oven. After extensive research, we literally found the only fridge in existence (that was available in the US and wasn't some super fancy expensive appliance that had to be imported from Germany) that would fit our shallow 24" counter depth and other very specific old school kitchen dimensions. It was one of those scary big purchases that we had to just buy blindly from an appliance store in New York without seeing the actual thing in person because it wasn't available locally, so we crossed our fingers and hoped for the best. Luckily, it all worked out perfectly. So, thanks Summit, for being the brand that no one's ever heard of that also looks out for those of us with tiny kitchens!

Secondly the gas wall oven. Did you know that the gas wall oven is basically obsolete? Seriously they are all electric now. If you've ever searched for wall ovens on homedepot.com, you probably started off with like maybe 300 options, but after selecting "gas" and 24" widths, guess what? You end up with ONE option. A couple weeks before we were to install our oven, homedepot.com gives me the biggest heart attack by announcing that our only oven option in existence was discontinued and no longer available. (The alternative? Pay $3000 to upgrade our circuit breaker box to handle an electric oven, which was not an option.) I panicked and cried and scoured the Internet to no avail. Luckily our handyman was kind enough to call a local appliance store on our behalf only to find that they had one unit left. It was a bold stroke of luck and we made a mad dash to the store to pick it up. So yes, for all intents and purposes, we feel like we got the last 24" Maytag Gas Wall Oven with Delayed-Start Control ever. 

In the end, we couldn't be happier with the results. Is it the ultimate chef's kitchen to end all kitchens? Not really. The drawers aren't those amazing soft close drawers, let alone have any tracks at all. The "vintage" cooktop is impossible to keep clean. The glass cabinet doors were a DIY job by a previous owner which has a ton of scratches and doesn't even align with the inside shelving. But you know, it's a little thing we like to call "character." And after living without a kitchen for months, finally having a kitchen at all and one to call our own just feels like a dream. 

Fridge: Summit  //  Faucet: Delta  //  Sink: Vigo  //  Light Pendant: Schoolhouse Electric  //  Water Kettle: Smeg  // Toaster Oven: Breville  //  Cooktop: "Vintage" Kenmore (original to the house)  //  Gas Wall Oven: Maytag  //  Microwave: Panasonic  //  Backsplash: The Tile Shop  //  Cabinet Pulls: MyKnobs.com   //  Sauce Pan: Dansk Kobenstyle  //  Copper Cannisters: Old Dutch

And finally, this is such a small detail but I have to mention it...we added an outlet to the counter area to make it a more functional space for working and charging devices! Did you know that you can replace any traditional outlet with a USB outlet? It's so brilliant and saves so much space. Definitely one of my favorite updates.

And now, I present to you, the BEFORES...enjoy!

Getting Ready for the Holidays

We're in full swing getting ready for our first Christmas in the new house! Family will be flying in from Hong Kong and New York next week and the pressure is ON to get our kitchen ready. Sanding and painting the cabinets, installing baseboards, replacing the cabinet door hinges, among a million little things! It's been stressful thinking about whether we can make it, but hey, Christmas isn't about having a beautiful, kind-of-newish kitchen, but spending time with loved ones and a warm puppy, am I right? (Though having a beautiful, kind-of-newish kitchen to cook and bake our favorite Christmas foods in wouldn't hurt one bit!)

Here is the prettier of side of what's been going on so far: just hanging up the stockings, wrapping presents, driving to the tree lot and grabbing one of the last trees because we procrastinated, trimming said last-minute tree with our small collection of ornaments and discovering that a 6-foot tree requires at least 4x as many ornaments as our 3-foot trees from previous years...all to the tune of "Merry Christmas, Happy Holidays" by N'Sync because after all these years, it is still one of our faves and we're not ashamed of it. #liveauthentic